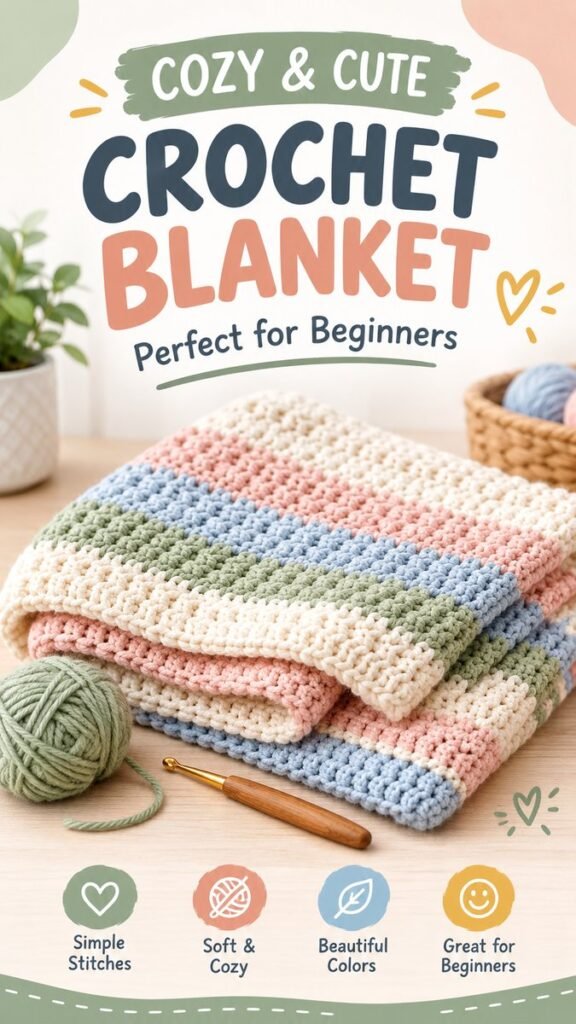
A handmade baby blanket is one of those crochet projects that feels both practical and deeply personal. The soft pastel stripes, chunky texture, and neatly folded layers shown here capture exactly why crochet blankets are so popular with beginners: they can look beautiful without requiring an overly complicated design. If you are learning how to crochet a baby blanket, a simple repeating pattern with gentle colors is a wonderful place to start. 🧶
This style works especially well for a cozy nursery, a thoughtful handmade gift, or a relaxing weekend crochet project. You can keep the construction simple, experiment with color changes, and gradually build confidence as each row takes shape.
Key Takeaways
- A simple repeating stitch pattern is ideal for a beginner crochet blanket.
- Soft cream, blush, sage, and blue create a gentle baby-friendly palette.
- Choose a yarn that feels soft and comfortable against delicate skin.
- Consistent tension helps create an even, polished blanket.
- Simple stripes can add visual interest without complicated shaping.
- Always check your finished measurements before using the blanket for a baby.
Why a Simple Crochet Baby Blanket Is a Great Beginner Project
When you are new to crochet, a blanket gives you something valuable: plenty of room to practice. Instead of working on a tiny project where every stitch feels critical, you can repeat the same basic movements across wider rows. With practice, your hands begin to find a natural rhythm.
A beginner-friendly baby blanket also gives you flexibility. You do not necessarily need intricate motifs, advanced shaping, or complicated colorwork. A straightforward stitch repeated row after row can create a wonderfully textured fabric, especially when combined with carefully chosen yarn colors.
Important: The beauty of a simple baby blanket comes from consistency. Even tension, tidy edges, soft yarn, and thoughtful color changes can make a basic crochet pattern look polished and intentional.
Materials for a Beginner Crochet Baby Blanket
You only need a few basic supplies to get started. The exact amount of yarn and hook size depends on the blanket dimensions, stitch pattern, yarn weight, and your personal tension.
- Soft yarn: Choose a comfortable yarn appropriate for baby items and easy to care for.
- Crochet hook: Select a hook recommended for your chosen yarn, adjusting if needed to achieve a comfortable fabric.
- Yarn needle: Useful for weaving in ends after changing colors.
- Scissors: Keep a small pair nearby for clean yarn changes.
- Measuring tape: Helpful for checking the width and length as you crochet.
- Stitch markers: Optional, but useful for keeping track of edges or pattern repeats.
Choosing the Right Yarn
For a baby blanket, softness and practicality are especially important. Look for yarn that feels pleasant rather than scratchy and consider how easy the finished blanket will be to wash. A smooth yarn can also make your stitches easier to see while you are learning.
The reference style uses a calming combination of cream, blush pink, pale blue, and muted green. This kind of palette creates a soft, timeless appearance. You can use the same color concept while choosing your own shades, or simplify the design to two colors for an even easier project.
How to Crochet a Baby Blanket Step by Step
The easiest approach is to choose one beginner-friendly stitch pattern and repeat it across the blanket. Before starting the full project, make a small sample. This lets you check your tension and see how the yarn and hook work together.
1. Decide on the Blanket Size
First, decide how large you want the finished blanket to be. A smaller blanket is easier to manage and can be a comfortable introduction to crochet. A larger design takes more yarn and time but allows you to practice the same stitch for longer.
Rather than relying only on a predetermined chain count, use your chosen yarn and gauge swatch to establish the width you want. This is especially useful because different crocheters naturally create slightly different stitch tension.
2. Make the Foundation Chain
Create a foundation chain that matches your desired width and the stitch repeat of your chosen pattern. Try not to make the chain excessively tight. A relaxed foundation makes it easier to work into the first row and helps prevent the bottom edge from pulling inward.
If your first row feels noticeably tighter than your chain, consider using a slightly larger hook for the foundation chain or consciously loosening your tension.
3. Work the First Row
Work your selected beginner stitch across the foundation chain. Simple stitches such as single crochet, half double crochet, or another easy repeating texture can create attractive blanket fabric. Follow the turning-chain instructions associated with your chosen stitch so the edges remain as even as possible.
At the end of the row, turn your work and begin the next row. Continue repeating the same stitch pattern unless your design calls for a color change or a different section.
4. Build the Blanket Row by Row
This is where the relaxing rhythm of crochet really begins. Keep working back and forth, checking your stitch count occasionally. If the blanket gradually becomes narrower or wider, you may have accidentally skipped or added stitches near an edge.
For a striped design like the one pictured, decide how many rows you want in each color. You can create equal stripes for a balanced look or vary the stripe widths to give the blanket a more playful appearance.
Expert Insight
- Count the first few rows carefully until your stitch rhythm becomes consistent.
- Lay the blanket flat occasionally to check whether the edges are staying straight.
- Use color changes at natural row boundaries to keep the stripes clean.
5. Change Colors for Soft Stripes
Color is one of the easiest ways to transform a basic crochet blanket. The pastel combination shown in the design creates a calm, cozy feel without making the project look overly complicated.
When changing colors, finish the current row neatly and introduce the next color according to the method recommended by your stitch pattern. Leave enough of each yarn tail to weave in securely later. Keeping color transitions consistent will help the finished blanket look professional.
6. Continue Until You Reach the Desired Length
Continue crocheting rows until the blanket reaches the length you want. Remember that crochet fabric can relax slightly after finishing, so checking the dimensions periodically is useful.
Do not worry if your first few rows are not perfect. Small variations are common when learning. As your hands become more comfortable with the hook and yarn, your stitches will usually become more consistent.
Simple Ways to Make Your Baby Blanket Look Beautiful
Use a Calm Color Palette
Soft shades can give a baby blanket a gentle, timeless appearance. Cream works beautifully as a neutral base, while muted pink, blue, green, beige, or lavender can add subtle contrast.
If you prefer a modern nursery aesthetic, try three or four coordinated shades instead of using many contrasting colors. Repeating the same colors throughout the blanket creates visual harmony.
Keep the Stitch Pattern Simple
Texture does not have to mean complicated crochet. A repeating stitch can create rows of attractive texture while remaining manageable for a beginner. The important thing is to choose a stitch you enjoy making and can repeat confidently.
Consider a Simple Border
A border can frame the blanket and give the edges a more finished appearance. A basic round of stitches in a neutral shade is often enough. Before adding a border, inspect the edges and gently adjust any obvious unevenness if your pattern allows it.
Common Beginner Crochet Mistakes to Avoid
Learning how to crochet a baby blanket is mostly about repetition, but a few common problems can make the process frustrating. Fortunately, most are easy to catch early.
- Losing stitches: Count your stitches at the end of several early rows.
- Adding extra stitches: Pay particular attention to the first and last stitch of every row.
- Uneven tension: Relax your hands and avoid pulling the yarn too tightly.
- Ignoring the edges: Lay your work flat from time to time to check its shape.
- Changing yarn inconsistently: Keep stripe widths deliberate so the finished design looks balanced.
- Skipping a gauge check: A small swatch can save considerable time on a larger project.
Pro Tip: If your blanket starts developing a noticeable wave or triangle shape, stop and inspect your stitch count before continuing. Correcting a small mistake early is much easier than unraveling many rows later.
Finishing Your Crochet Baby Blanket
Once the final row is complete, secure the yarn according to your pattern and weave in the loose ends. Take your time with this step. Neatly finished yarn tails help the blanket look cleaner and make the final piece easier to care for.
If your yarn and pattern allow it, gently wash or block the finished blanket according to the yarn manufacturer’s care instructions. This can help the stitches settle and reveal the final shape and texture.
Check the Finished Blanket
Before gifting or using the blanket, look over the entire piece. Check for loose ends, missed stitches, uneven sections, or areas that need additional finishing. Make sure all embellishments, if any, are securely attached. For baby items, simplicity is often the safest approach.
Ideas for Personalizing a Handmade Baby Blanket
Once you are comfortable with the basic construction, there are plenty of ways to make your blanket feel personal. You can change the stripe sequence, create wider or narrower color bands, or choose a completely different palette.
- Try cream with dusty rose for a warm, delicate look.
- Combine pale blue, sage, and ivory for a calm natural palette.
- Use neutral shades for a timeless nursery blanket.
- Alternate two colors for a clean, modern striped effect.
- Experiment with texture while keeping the overall stitch repeat beginner-friendly.
The beauty of handmade crochet is that small design decisions can make a familiar pattern feel completely different. Even a simple baby blanket becomes special when you choose colors and textures with the recipient in mind.
At a Glance
- Choose soft, practical yarn.
- Make a small gauge swatch first.
- Keep the stitch pattern repetitive and manageable.
- Use coordinated colors for simple visual interest.
- Check your stitch count and edges regularly.
Conclusion
Learning how to crochet a baby blanket does not have to begin with a complicated pattern. A simple stitch, soft yarn, thoughtful color palette, and steady rhythm can create a beautiful handmade piece. The pastel striped style shown here is a great source of inspiration because it demonstrates how texture and color can do most of the design work.
Start with a manageable size, practice your stitch pattern, and give yourself permission to learn as you go. Every row is another opportunity to improve your tension and technique. Before long, those individual stitches become a cozy blanket with a personal handmade touch.
Ready to pick up your hook? Choose your favorite soft colors, gather your basic crochet supplies, and begin with a simple repeating pattern. Your next cozy baby blanket can start with just one foundation chain.