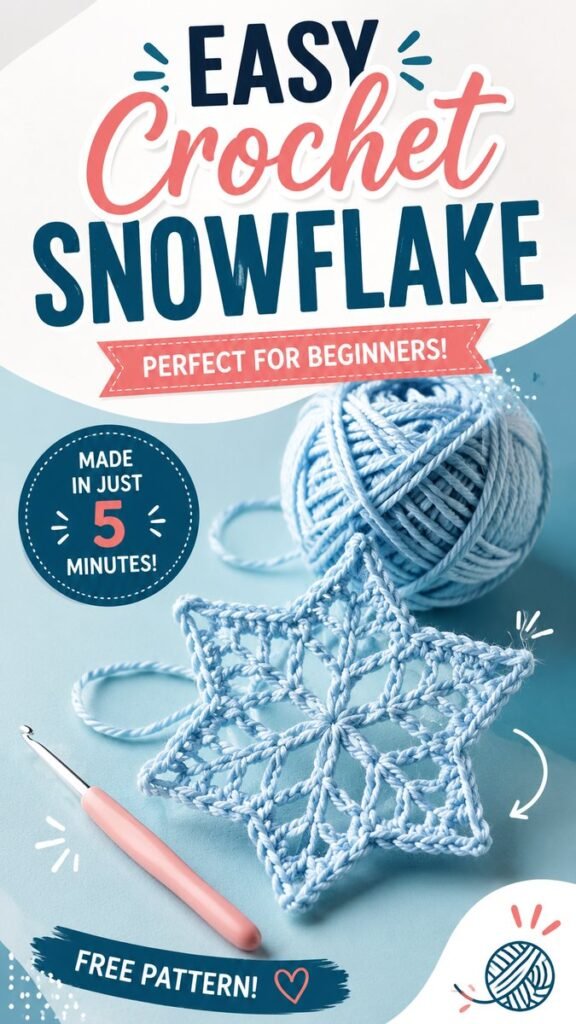
Crochet snowflakes are one of those small handmade projects that can instantly bring a cozy winter feeling to your home. With a little yarn, a crochet hook, and a simple pattern, you can create delicate snowflake decorations that look beautiful on a tree, gift package, window, garland, or seasonal display. They are also wonderfully approachable for beginners because the finished design can be made from basic crochet techniques and repeated shapes.
If you are searching for crochet snowflakes free patterns, this is a great project category to explore. Snowflakes offer plenty of room for creativity while keeping the finished pieces lightweight, inexpensive, and easy to customize. Whether you want a quick five-minute-inspired craft or a more detailed decorative motif, the basic idea can be adapted to suit your skill level and style.
Key Takeaways
- Simple crochet snowflakes can be a beginner-friendly seasonal craft.
- Lightweight yarn helps create delicate, defined decorative motifs.
- Blocking can make finished snowflakes look cleaner and more symmetrical.
- Snowflakes can be used for ornaments, garlands, gift wrapping, and winter decor.
- Changing yarn color, size, and finishing details creates many different looks.
- Saving several free crochet snowflake patterns gives you options for future projects.
Why Crochet Snowflakes Make Great Winter Crafts
Crochet snowflakes combine the charm of handmade crafting with the clean, airy appearance of traditional winter snow crystals. Unlike bulky crochet projects that can take days or weeks to finish, small motifs can often be completed relatively quickly. That makes them satisfying projects when you want something creative without committing to a large piece.
They are also versatile. A single snowflake can become a hanging ornament, while several can be joined together to create a garland or decorative wall arrangement. Smaller versions can be attached to presents, greeting cards, baskets, wreaths, or table settings.
The visual structure is another reason they are so appealing. Snowflake designs naturally radiate from a central point, creating symmetrical arms and open spaces. Crochet is particularly suited to this kind of pattern because chains, stitches, loops, and spaces can be arranged into geometric motifs.
Important: The beauty of a crochet snowflake does not depend on making every stitch complicated. Clean tension, consistent spacing, and careful finishing can make a simple pattern look polished and intricate.
Choosing Yarn for Crochet Snowflakes
Yarn choice has a noticeable effect on the character of a finished snowflake. If you want a delicate decoration similar to the airy motif shown in the design, a relatively lightweight yarn is a practical place to start. Thinner yarn generally allows you to create smaller details and open spaces without making the finished piece look too heavy.
Try a Winter-Inspired Color Palette
Blue is a natural choice for crochet snowflakes because it creates a cool, frosty appearance. Pale blue can give the project a soft winter feel, while deeper blue creates stronger contrast. White, cream, silver-inspired neutrals, and icy pastels can also work beautifully.
There is no need to restrict yourself to traditional winter colors. Soft pink, sage green, lavender, or even a warm neutral can turn the same basic motif into something completely different.
Consider Yarn Texture
A smooth yarn is often helpful when you want stitch details to remain visible. Highly textured yarn can make small openings and individual stitches harder to distinguish. For decorative snowflakes, clarity is usually more important than adding lots of surface texture.
Before beginning a large batch, make one sample. This lets you see how the yarn behaves and whether the resulting snowflake has the level of definition and flexibility you want.
Basic Supplies You Can Start With
One of the best things about crochet snowflake projects is that the supply list can remain simple. The image shows the classic combination of yarn and a crochet hook, which is enough to communicate the approachable nature of the craft.
- Lightweight yarn in your preferred color
- A crochet hook appropriate for the yarn
- Scissors for trimming the finished piece
- A yarn needle for weaving in loose ends
- Blocking supplies if you want a particularly crisp shape
You do not need an elaborate collection of tools to get started. If you already crochet, there is a good chance most of these supplies are already in your craft basket.
Understanding the Shape of a Crochet Snowflake
The defining feature of a crochet snowflake is its radial structure. Instead of building a long rectangular piece row by row, the motif develops around a central area. Stitches and chain spaces extend outward to form multiple arms.
This structure makes snowflakes particularly interesting for beginners who want to practice working in rounds. You can learn how individual stitch groups contribute to a larger shape while seeing the design develop after every round.
The Center
Most snowflake motifs begin from a small center. This foundation provides the anchor for the rest of the design. Keeping the center neat is important because uneven tension here can affect the symmetry of the entire snowflake.
The Radiating Arms
From the center, repeated stitch arrangements create the outward points. Depending on the pattern, these may be narrow, wide, rounded, or sharply pointed. Open chain spaces help create the lace-like appearance associated with snowflake decorations.
The Outer Edge
The final round often determines how crisp the snowflake looks. Small loops, points, and spaces can define the silhouette and make the individual arms easier to see. Paying attention to the final round can make a surprisingly large difference in the finished appearance.
Expert Insight
If your snowflake looks wavy or refuses to lie flat, do not immediately assume the pattern is wrong. Uneven tension, yarn weight, hook size, or the need for blocking can all influence the final shape.
- Keep your tension as consistent as possible.
- Count repeated sections when the pattern requires symmetry.
- Block the finished motif if you want sharper points and cleaner openings.
How to Make a Beginner-Friendly Crochet Snowflake
When working from a free crochet snowflake pattern, begin by reading through the instructions before picking up your hook. Look for unfamiliar abbreviations and make sure you understand whether the pattern is worked in rounds or separate sections.
- Choose your yarn and hook. Select a combination that gives you a comfortable, flexible fabric.
- Create the center. Follow the foundation instructions carefully so the beginning remains even.
- Build the first round. Work the required stitches and spaces around the center.
- Repeat the snowflake sections. Keep the repeated arms as consistent as possible.
- Shape the outer points. Pay attention to chain spaces and stitch placement along the final round.
- Finish securely. Cut the yarn, fasten off, and weave in the loose end.
- Block if desired. Gently shape the snowflake and allow it to dry completely before displaying it.
The exact stitches and number of rounds will vary from pattern to pattern, so use these steps as a general workflow rather than a replacement for a specific pattern. The goal is to understand how a snowflake is constructed and how you can approach similar designs with confidence.
Tips for Getting Cleaner Crochet Snowflakes
Small crochet motifs can make inconsistencies more noticeable than larger projects. A slightly loose stitch that would disappear in a blanket may change the balance of a tiny snowflake. Working slowly and paying attention to repeated sections can help.
Maintain Consistent Tension
Try to keep your yarn tension steady throughout the project. If some chains are dramatically looser than others, the arms of the snowflake may become uneven. Relaxed hands often make crochet more enjoyable and can help prevent overly tight stitches.
Count Repeated Sections
Symmetry is central to the snowflake aesthetic. If your pattern repeats a sequence around the center, count carefully as you work. It can be helpful to place a stitch marker at the beginning of each round.
Do Not Skip the Finishing Stage
Weaving in ends and shaping the finished motif may feel like minor details, but they help transform a completed crochet piece into a finished decoration. A little extra attention at the end can improve both appearance and durability.
Pro Tip: Make several snowflakes using the same yarn but slightly different sizes. Displaying a small group with varied dimensions can create a more natural and visually interesting winter arrangement.
Creative Ways to Use Crochet Snowflakes
Once you have made a few crochet snowflakes, you may find yourself looking for more ways to use them. Their small size makes them ideal for projects that need a subtle handmade detail rather than a large decoration.
Christmas Tree Ornaments
Add a simple loop to the top and turn your snowflake into a lightweight ornament. A collection of handmade motifs can give a tree a cohesive craft-inspired appearance.
Winter Garlands
Join several snowflakes along a length of yarn or cord to create a delicate garland. Mix sizes for more visual movement, or keep every motif identical for a clean, repetitive look.
Gift Wrapping
A handmade snowflake can make a simple wrapped gift feel more personal. Attach one to ribbon or twine and let the recipient reuse it as a decoration.
Seasonal Table Decor
Flat crochet snowflakes can also work as small decorative accents on a winter table. Place them beneath small centerpieces, alongside folded napkins, or around other seasonal decorations.
Handmade Cards and Crafts
Smaller motifs can be incorporated into handmade cards, scrapbook layouts, gift tags, and other paper crafts. Their open structure makes them especially useful when you want a decorative detail that does not visually overwhelm the project.
Making Crochet Snowflakes Look Crisp
Freshly crocheted snowflakes may not immediately have the perfectly defined shape you imagine. Yarn naturally retains some movement, and small motifs can curl or twist. Blocking is a useful finishing technique when you want the points and openings to become more distinct.
For a basic blocking process, gently dampen the finished snowflake according to the care needs of your yarn, then carefully arrange it into the desired shape. Pay special attention to the points and the spaces between the arms. Allow it to dry completely before removing it from the blocking surface.
The purpose is not to force the yarn into an unnatural shape. Instead, blocking helps organize the existing stitches so the design becomes easier to see.
How to Personalize Your Snowflake Patterns
One of the most enjoyable parts of crochet snowflake patterns is experimentation. Once you understand the basic structure, small changes can create a completely different result.
- Use a different yarn color for a new seasonal mood.
- Change yarn weight to create larger or smaller motifs.
- Experiment with simple border variations.
- Combine two complementary colors for a decorative effect.
- Create matching sets in several sizes.
- Add hanging loops when making ornaments.
Keep notes as you experiment. Recording the yarn, hook, and modifications you use can make it much easier to recreate a favorite snowflake later.
Building a Collection of Free Crochet Snowflake Patterns
If you enjoy the first snowflake you make, consider creating a small personal library of free crochet snowflake patterns. Save designs according to difficulty, size, stitch style, and intended use. This makes it easier to find the right project when you need a quick handmade decoration.
Beginner patterns are particularly useful for practicing basic crochet skills. Once you feel comfortable with circular construction and repeated stitch sequences, you can explore more elaborate lace-style motifs with additional rounds and decorative details.
Saving patterns before the winter crafting season can also help you plan larger projects. A handful of snowflakes can become an ornament collection, while dozens can be combined into garlands or other decorative displays.
At a Glance
Quick Points
- Choose smooth, lightweight yarn for delicate details.
- Work carefully around the center to maintain symmetry.
- Use stitch markers when repeated rounds become difficult to track.
- Block finished snowflakes for cleaner points and open spaces.
- Turn finished motifs into ornaments, garlands, gifts, or winter decor.
Final Thoughts on Crochet Snowflakes
Crochet snowflakes are a wonderful example of how a small project can have a big decorative impact. They require relatively few supplies, can be adapted to different skill levels, and offer countless opportunities for personalization. A simple ball of yarn and a crochet hook can become a collection of delicate winter motifs that you can enjoy year after year.
If you are new to crochet, start with a simple snowflake and focus on consistent tension, careful counting, and clean finishing. If you already have crochet experience, use the basic snowflake structure as an invitation to experiment with colors, sizes, borders, and combinations.
The most important thing is to enjoy the process. Save your favorite crochet snowflakes free patterns, gather your yarn, and make a few motifs whenever you have a spare moment. Before long, you can have a handmade collection ready for seasonal decorating, thoughtful gift wrapping, and creative winter projects.
Tags
Crochet Snowflakes Free Crochet Patterns Beginner Crochet Winter Crochet Crochet Ornaments Christmas Crochet Easy Crochet Projects DIY Winter Decor