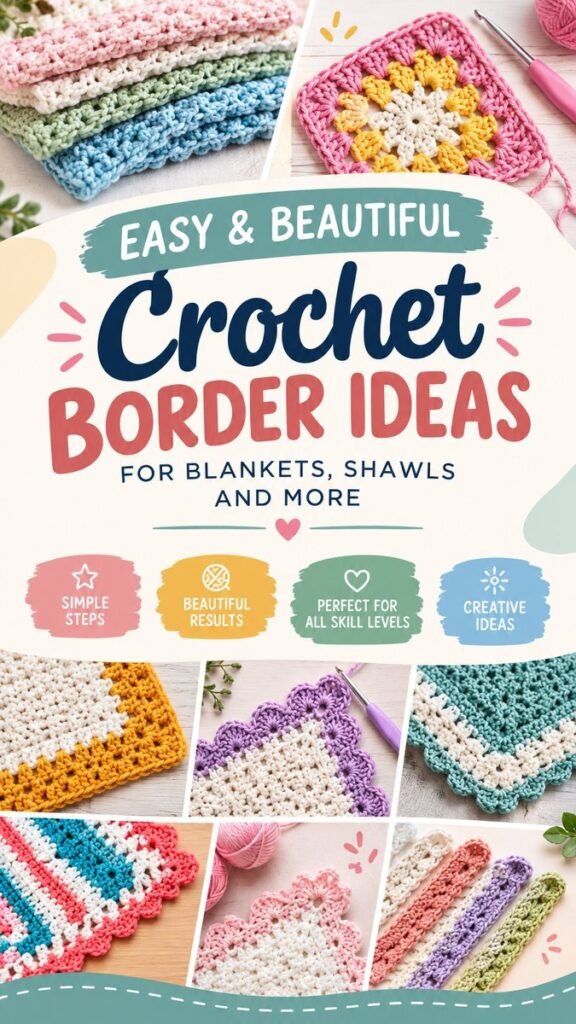
Easy crochet edging and borders can turn a simple handmade project into something that looks polished, intentional, and beautifully finished. A well-chosen border adds structure to blankets, shawls, towels, baby pieces, scarves, and decorative crochet projects without requiring a complicated pattern. From neat, simple edges to scalloped, picot, floral, and colorful decorative borders, there are countless ways to give your crochet a distinctive finishing touch.
The ideas featured here highlight a variety of crochet edging styles, including subtle textured trims, colorful corner details, soft scallops, and more decorative openwork designs. Whether you are finishing your first blanket or looking for fresh inspiration for a favorite crochet technique, these easy crochet borders can help you choose a style that fits your project.
Key Takeaways
- Simple crochet borders can give basic projects a finished, professional appearance.
- Scalloped, picot, textured, and openwork edges offer different decorative effects.
- Matching the border yarn to the main project creates a calm, coordinated look.
- A contrasting color can make the edging stand out and frame the entire design.
- Choosing a border that suits the fabric helps maintain a neat shape and balanced finish.
Why Crochet Edging Makes Such a Difference
The final round of a crochet project is more than a finishing step. It can change the overall appearance of the piece. A plain blanket can become more decorative with a simple scalloped edge, while a colorful afghan may look even more striking when framed with a coordinated border.
Crochet edging also provides an opportunity to bring together the colors and textures already used in a project. A border can repeat a shade from the center, introduce a complementary tone, or create a clean visual frame around a multicolored design.
For beginners, edging is also a useful way to practice basic crochet stitches. Many attractive borders rely on familiar stitches arranged in simple combinations, making them approachable without requiring an advanced level of experience.
Important: The best crochet border does not always have to be the most complicated one. A simple, evenly worked edge can look just as beautiful as an elaborate design when it complements the main crochet fabric.
Easy Crochet Edging Ideas to Try
There is no single style that works for every project. The right edging depends on the look you want, the type of crochet fabric you are finishing, and how decorative you want the final piece to be. The following ideas are excellent starting points when you want a beautiful border without making the finishing process overwhelming.
Simple Single Crochet Border
A simple single crochet border is one of the easiest ways to create a clean edge. It works especially well when you want the main pattern to remain the focus. A few neat rounds can help define the outer shape while adding a subtle frame.
This style is particularly useful for modern blankets, minimalist crochet pieces, and projects with a detailed stitch pattern in the center. Choose a matching yarn for a seamless appearance or use a contrasting shade for a stronger outline.
Scalloped Crochet Edging
Scallops add a soft decorative finish without requiring a complicated construction. The rounded shapes create movement along the edge and work beautifully on blankets, baby items, shawls, and other projects where a gentle finish is desired.
Small scallops can create a delicate appearance, while larger shells make the border more noticeable. The number of stitches used in each repeat can also influence how full or subtle the finished edge looks.
Picot Edging
Picot edging is another classic choice for adding small decorative points along a crochet border. It creates a lightly textured outline that can look delicate without overpowering the project.
This type of finish is especially appealing when you want something more interesting than a straight edge but still prefer a relatively understated design. It can be worked in the same color as the project or highlighted with a contrasting shade.
Shell and Fan Borders
Shell and fan-inspired borders create a fuller decorative effect. Groups of stitches are worked together to form rounded or fan-shaped sections that repeat around the project.
These borders can make a simple crochet fabric feel more traditional and decorative. They are also useful when you want the edging to become an important visual feature rather than simply serving as a neat finishing round.
Textured Crochet Borders
Not every beautiful border needs a dramatic shape. Texture can be enough to create interest. Raised stitches, alternating stitch heights, ridges, and carefully repeated patterns can produce a sophisticated finish.
Textured borders are particularly effective when the main crochet fabric is relatively simple. The contrast between a smooth center and a tactile outer edge creates a subtle but attractive frame.
Choosing the Right Border for Your Project
Before beginning an edging, consider the overall character of your crochet piece. A delicate shawl may benefit from a lightweight decorative edge, while a thick blanket can support a wider and more substantial border.
It is also worth looking at the existing stitch pattern. If the body of your project already has a lot of texture, a simpler border may provide balance. On the other hand, a plain or repetitive center gives you more freedom to experiment with decorative edging.
- For blankets: Try structured borders, scallops, shells, textured rounds, or layered color combinations.
- For shawls: Consider delicate picots, openwork, small scallops, or lightweight decorative trims.
- For baby projects: Soft scallops and simple rounded edges can create a gentle finished look.
- For modern designs: Use clean straight borders, minimal textures, or one contrasting color.
- For colorful projects: Repeat one existing shade or choose a neutral frame to bring the design together.
How to Choose Border Colors
Color can completely change the effect of a crochet border. Using the same yarn color creates continuity and allows the stitch pattern to become the main feature. This is an excellent approach when the project already contains several colors.
A contrasting border creates a stronger frame. For example, a pale crochet fabric can be outlined with a deeper shade, while a bright multicolor piece can be finished with a soft neutral tone.
You can also select one color already present in the project and repeat it around the edge. This small design decision can make a multicolored blanket feel more cohesive without introducing another shade.
Expert Insight
Think of the border as a frame. If the main crochet pattern is already visually busy, use a calmer edge. If the center is simple, a decorative border can become the feature that gives the entire piece more personality.
Tips for Getting a Neat Crochet Border
Even a simple crochet edging looks much better when it is worked evenly. Uneven tension can cause the outer edge to ripple, pull inward, or become wider on one side. Taking a little time to prepare the edge can make the final result much cleaner.
Check the Edge Before Starting
Look over the entire project before adding the border. If the edge is uneven or has noticeable gaps, consider how the first round can compensate for those areas. The goal is to create a stable foundation for the decorative rounds that follow.
Keep Your Tension Consistent
Try to maintain the same relaxed tension throughout each side and corner. Pulling the yarn too tightly can make the edge contract, while loose stitches may create unwanted waves.
Pay Attention to Corners
Corners deserve special attention because they determine how the border turns from one side to the next. Follow the pattern instructions carefully and make sure the corner has enough room to turn naturally.
Count Repeats When Necessary
Some decorative borders require a specific number of stitches for each repeat. If the pattern calls for a particular stitch multiple, check your foundation edge before beginning. A little planning can prevent an awkward final section where the repeat no longer fits.
Pro Tip: If you are unsure how a border will look, crochet a small sample first. A short test section lets you compare yarn colors, stitch scale, and texture before committing to the entire project.
Making Crochet Borders More Creative
Once you are comfortable with basic edging, you can start combining ideas. A simple foundation round can be followed by a contrasting textured round and finished with small scallops. This creates a layered appearance without requiring every round to use a complex stitch.
Color changes are another easy way to personalize a border. Instead of using one shade throughout, alternate two coordinating colors for a striped frame. For a softer look, use closely related shades. For a playful project, choose colors with more contrast.
You can also vary the width of your border. A narrow edging may be enough for a scarf or shawl, while a blanket can support several rounds. The key is to keep the proportions balanced with the size and weight of the project.
Crochet Border Ideas for Blankets
Blankets are one of the most popular projects for decorative crochet borders because the large surface gives the edging plenty of room to make an impression. A simple blanket can be transformed with a colorful frame, while a patterned blanket can be finished with a quieter edge.
For a modern blanket, consider a clean border in one solid color. For a cozy traditional look, scallops and shell-inspired patterns add softness. If the blanket already includes several colors, select one shade from the design and repeat it around the outside.
Wide borders can also create a stronger visual frame. However, the border should still complement the center rather than competing with it. When in doubt, start with a narrow edge and add additional rounds gradually.
Crochet Borders for Shawls and Smaller Projects
Smaller projects often benefit from lighter edging. A narrow picot border, tiny scallop, or delicate textured round can finish a shawl without making the edge feel heavy.
For scarves, washcloths, decorative squares, and similar projects, simple repeated stitches can provide enough detail. Since these pieces are smaller, even a subtle color change can have a noticeable visual effect.
A Simple Process for Planning Your Border
If you are not sure where to begin, use a straightforward planning process before picking up your hook.
- Look at the stitch pattern and overall shape of your project.
- Decide whether you want the border to blend in or stand out.
- Choose a matching, neutral, or contrasting yarn color.
- Select a border style that suits the weight and texture of the fabric.
- Test a small section to check the scale and tension.
- Work around the project carefully, paying extra attention to corners.
- Finish and inspect the edge before blocking or final shaping if appropriate.
Why Simple Crochet Borders Are Worth Saving
Having a collection of easy crochet edging ideas on hand can make finishing future projects much easier. Instead of searching for a new border every time you complete a blanket or shawl, you can keep a few dependable styles ready to adapt.
Simple borders are also versatile. The same basic edging can look completely different when worked in another yarn color, repeated for several rounds, or combined with a different stitch. That makes border patterns useful building blocks for your own crochet designs.
The variety of examples shown through colorful swatches, textured edges, scalloped shapes, and decorative corners demonstrates just how much personality can be added around the outside of a handmade piece. You do not need an elaborate technique to create an attractive result. Often, the right combination of stitch, color, and spacing is enough.
At a Glance
- Keep simple projects polished with a clean single-color border.
- Add personality with scallops, shells, picots, or textured stitches.
- Use contrasting yarn when you want the border to become a focal point.
- Match the border width to the size and weight of your project.
- Test your edging before working around the entire piece.
Conclusion
Easy crochet edging and borders are a simple way to make handmade projects feel complete. Whether you prefer a clean modern frame, soft scallops, delicate picots, colorful trims, or richly textured rounds, there is plenty of room to experiment.
The most successful border is one that works with the project rather than competing against it. Consider the stitch pattern, yarn weight, colors, shape, and overall style before choosing your edging. A small sample can help you decide whether the border has the right scale and tension.
From cozy blankets and decorative squares to shawls, baby projects, and everyday crochet pieces, a thoughtful border can add that final detail that makes a handmade creation feel truly finished. Save your favorite crochet border ideas, experiment with different color combinations, and enjoy giving each project its own unique finishing touch.
Tags
Crochet Edging Crochet Borders Easy Crochet Crochet Blanket Borders Crochet Border Patterns Crochet Ideas Scalloped Crochet Edging span style=”display:inline-block;background:#f0f4f6;color:#4d6570;border-radius:20px;padding:8px 14px;margin:4px;font-size:14px;”>Crochet Tips