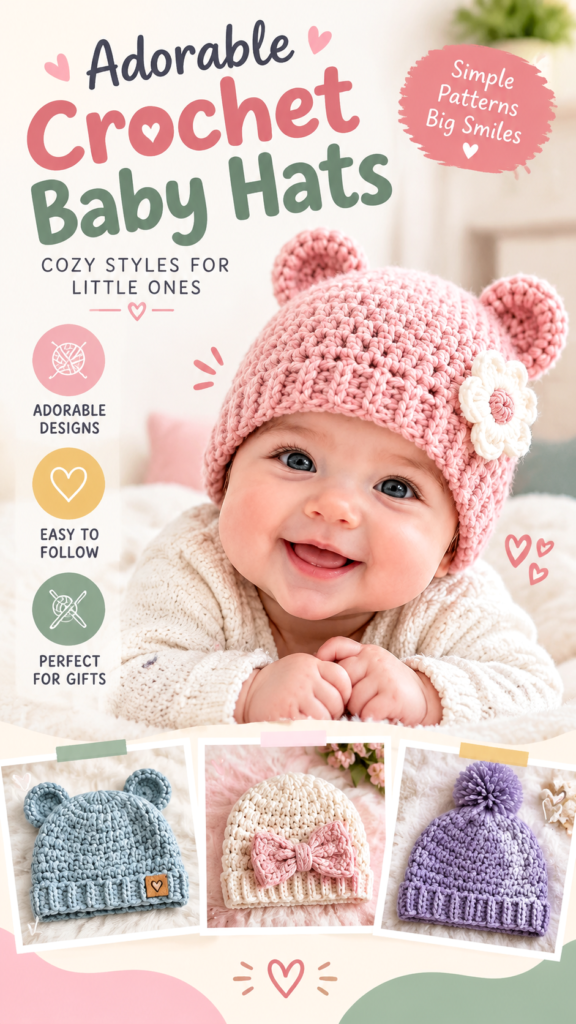
The crochet baby hat pattern featured in this project is a sweet, cozy accessory designed for little ones who need gentle warmth and handmade charm. Inspired by a soft textured beanie style with rounded shaping, small decorative ear details, and a comfortable ribbed edge, this original crochet design creates a classic baby hat that is both practical and adorable.
This beginner-friendly crochet project uses simple stitches, thoughtful shaping, and soft yarn to create a wearable hat suitable for newborns and young babies. The pattern below is an original interpretation using a practical crochet construction method, with suggested materials and measurements to help you create a similar style.
Key Takeaways
- Project type: Soft crochet baby hat with textured stitches and decorative ears
- Skill level: Confident beginner friendly with basic shaping techniques
- Construction: Worked in joined rounds from the crown downward
- Recommended yarn: Soft washable baby yarn for comfort and easy care
- Main techniques: Single crochet, half double crochet, ribbed edging, and simple assembly
- Customization: Easily adjustable for different baby sizes and color styles
Crochet Baby Hat Pattern Project Description
This crochet baby hat pattern creates a rounded beanie shape with a snug but comfortable fit. The visible design inspiration includes a soft pastel color palette, a textured crochet fabric, a folded-looking brim, and playful ear accents that give the hat a charming animal-inspired appearance.
The hat is designed as a practical handmade crochet gift idea for baby showers, newborn gifts, seasonal photo sessions, or everyday baby outfits. The recommended construction begins at the crown and works downward in joined rounds, allowing the maker to create a smooth dome shape while gradually increasing the circumference.
The original design uses a combination of single crochet stitches for structure and half double crochet stitches for a soft fabric texture. A ribbed lower edge adds stretch around the baby’s head while helping the hat maintain its shape.
Crochet Construction and Stitch Analysis
The pictured style is best recreated with a top-down hat construction rather than separate panels. This method creates fewer seams and allows the crown shaping to blend naturally into the body of the hat.
- Construction method: Joined rounds worked from the crown to the brim
- Shape: Rounded baby beanie with gentle crown increases
- Texture: Dense crochet fabric created with basic stitches and slight stitch variation
- Yarn suggestion: Lightweight, soft acrylic or cotton blend baby yarn
- Recommended hook range: Approximately 3.75 mm to 4.0 mm depending on yarn and tension
- Difficulty: Beginner to easy intermediate
Important: Baby hats depend heavily on accurate sizing. Always measure the baby’s head circumference when possible and adjust the number of increase rounds if your yarn weight or crochet tension differs from the suggested gauge.
Free Crochet Baby Hat Pattern
Little Cloud Ear Beanie
Pattern Description: This original crochet baby hat pattern creates a soft rounded beanie featuring a stretchy brim and optional crochet ears. It is designed as a simple handmade crochet project using beginner-friendly stitches.
| Skill Level | Easy |
| Finished Size | Newborn to 3 months: approximately 13 inches (33 cm) head circumference |
| Yarn | Suggested Category 3 light yarn, soft acrylic or cotton blend, about 120 yards (110 meters) |
| Hook | Suggested 4.0 mm crochet hook (US G/6) |
| Gauge | 18 half double crochet stitches x 12 rounds = 4 inches (10 cm) |
| Terminology | US crochet terms |
Materials
- Category 3 light baby yarn, approximately 120 yards (110 meters)
- 4.0 mm crochet hook (US G/6)
- Stitch marker
- Yarn needle
- Scissors
- Small amount of matching yarn for optional ears
Abbreviations
- ch: chain
- sl st: slip stitch
- sc: single crochet
- hdc: half double crochet
- hdc inc: work 2 half double crochet stitches in the same stitch
- st: stitch
- rnd: round
Special Stitch Notes
Half Double Crochet Increase: Work 2 half double crochet stitches into the same stitch.
Joined Round: Each round ends by joining with a slip stitch to the first stitch of the round. Chain 1 does not count as a stitch throughout this pattern.
Hat Instructions
- Round 1: Make a magic ring. Ch 1, work 8 hdc into ring. Join with sl st. (8 sts)
- Round 2: Ch 1, work 2 hdc in each stitch around. Join. (16 sts)
- Round 3: Ch 1, work 1 hdc in first stitch, 2 hdc in next stitch. Repeat around. Join. (24 sts)
- Round 4: Ch 1, work 1 hdc in each of the first 2 stitches, 2 hdc in next stitch. Repeat around. Join. (32 sts)
- Round 5: Ch 1, work 1 hdc in each of the first 3 stitches, 2 hdc in next stitch. Repeat around. Join. (40 sts)
- Round 6: Ch 1, work 1 hdc in each of the first 4 stitches, 2 hdc in next stitch. Repeat around. Join. (48 sts)
- Rounds 7 to 14: Ch 1, work 1 hdc in each stitch around. Join after each round. (48 sts)
Ribbed Brim
The brim is created with rows worked across the edge to create vertical texture.
- Attach yarn at the bottom edge of the hat.
- Row 1: Ch 8. Sc in second chain from hook and across. Sl st into the next 2 hat stitches. (7 sc)
- Row 2: Turn. Sc in back loops only across. (7 sts)
- Repeat Row 2 until the brim wraps around the entire hat circumference.
- Join the first and last brim rows together using slip stitches through the back loops.
- Fasten off and weave in ends.
Optional Crochet Ears
- Make a magic ring.
- Round 1: Work 6 sc into the ring. Join. (6 sts)
- Round 2: Ch 1, work 2 sc in each stitch around. Join. (12 sts)
- Round 3: Ch 1, work 1 sc in each stitch around. Join. (12 sts)
- Fold the circle slightly and flatten. Leave a long yarn tail for sewing.
- Make a second ear following the same instructions.
- Sew ears securely near the top sides of the hat.
Safety Reminder: For babies and young children, avoid loose buttons, beads, or detachable decorations. Embroidered details or securely stitched crochet features are safer options for baby items.
Customization and Size Adjustment Guidance
This crochet baby hat pattern can be adjusted for different ages by changing the crown circumference before working the straight body rounds.
- Newborn: Use fewer increase rounds and aim for approximately 12 to 13 inches (30 to 33 cm) circumference.
- 3 to 6 months: Add one additional increase round to reach approximately 14 inches (36 cm).
- 6 to 12 months: Continue increasing until the crown measures about 5 inches (13 cm) across.
To make a taller hat, simply add additional hdc rounds before beginning the brim. For a slouchier style, add two to three extra rounds while maintaining the same stitch count.
Common Crochet Mistakes and Troubleshooting
- Hat feels too tight: Try a larger hook size or check that your gauge matches the recommended tension.
- Crown looks wavy: Too many increases can create extra fabric. Confirm stitch counts after each round.
- Brim curls: Blocking and gentle shaping can help relax the crochet fabric.
- Uneven shape: Use a stitch marker to keep track of round beginnings.
Finishing, Blocking, and Care
After completing the hat, gently shape it with your hands and check the overall fit. Light blocking can soften the stitches and improve the finished appearance, especially when using cotton blends.
Wash the hat according to the yarn label instructions. For baby items, gentle washing and air drying are recommended to help preserve the shape and softness.
At a Glance
- Best yarn choice: Soft washable baby yarn
- Skill level: Beginner friendly crochet project
- Key technique: Joined rounds with simple increases
- Customization: Adjust crown size and hat length easily
- Finishing method: Secure ends, shape gently, and wash carefully
Final Thoughts on This Crochet Baby Hat Pattern
This crochet baby hat pattern is a cozy handmade project that combines simple crochet stitches with sweet details. Whether you are creating a baby shower gift, a first crochet accessory, or a seasonal hat for a little one, this design offers plenty of room for personalization.
Choose a soft yarn, check your gauge when needed, and read through the complete pattern before beginning. Experiment with colors, add gentle texture, and enjoy creating a handmade crochet piece that feels special and practical.
Tags
Crochet Baby Hat Pattern
Easy Crochet Project
Beginner Crochet Pattern
Handmade Crochet
Baby Crochet Gift
Crochet Tutorial