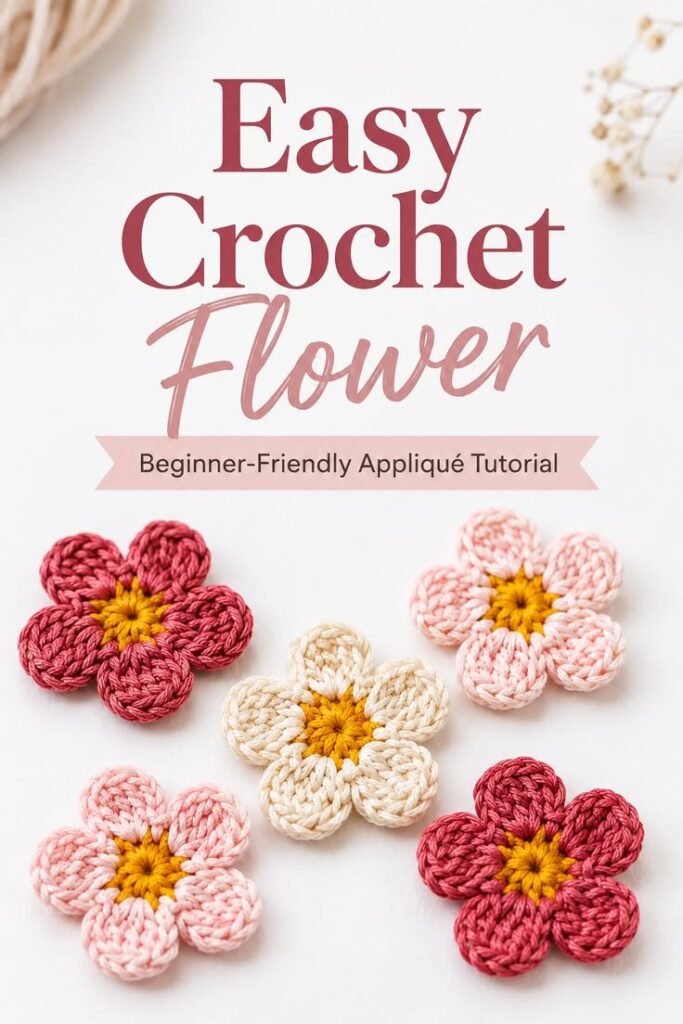
There is something wonderfully satisfying about turning a small amount of yarn into a cheerful crochet flower. A simple flower motif can become a colorful embellishment, a decorative accent, or the starting point for a much larger handmade project. This crochet flower tutorial is designed to help you understand the basic structure of a flower motif while giving you plenty of ideas for customizing the colors, size, texture, and finished look.
Whether you are new to crochet or simply looking for a quick project between larger makes, crochet flowers are a fun way to practice familiar stitches without committing to a long pattern. They can be made individually, combined into clusters, or attached to other crochet pieces for an extra handmade touch.
Key Takeaways
- A crochet flower is a quick and versatile project for many skill levels.
- Different yarn colors can completely change the character of the finished flower.
- Consistent tension helps keep petals neat and evenly shaped.
- Small flowers are ideal for using leftover yarn from other projects.
- Finished motifs can be used for accessories, gifts, garments, blankets, and home décor.
Why Crochet Flowers Are Such a Fun Project
Crochet flowers are popular because they offer plenty of creativity without requiring a large amount of yarn or time. A single flower can be made in a short sitting, making this type of project especially appealing when you want something handmade but do not want to start a complicated pattern.
They are also excellent practice pieces. Repeating stitches around a center helps you become more comfortable with working into spaces, counting stitches, controlling tension, and shaping individual sections of a motif.
Another advantage is the opportunity to experiment. You can make a soft pastel flower for a delicate accessory, choose bright colors for a playful look, or use neutral shades for understated home décor. The basic idea remains the same while the visual result changes dramatically.
Important: The most attractive crochet flowers do not necessarily require complicated stitches. Clean tension, balanced petals, thoughtful color choices, and careful finishing can make a simple flower look polished and intentional.
What You Need for a Crochet Flower
One of the best things about a crochet flower tutorial is the short supply list. For a basic flower motif, you generally need yarn, a crochet hook that works comfortably with your chosen yarn, scissors, and a yarn needle for finishing.
- Yarn: Cotton, acrylic, wool blends, or other suitable yarns can work well depending on the intended use.
- Crochet hook: Choose a hook appropriate for the yarn weight and the firmness you want.
- Scissors: Use sharp scissors for a clean yarn cut.
- Yarn needle: A blunt tapestry needle makes weaving in ends much easier.
- Optional embellishments: Buttons, beads, embroidery, or contrasting yarn can be added to the center.
If you are using leftover yarn, this is a perfect opportunity to explore your scrap collection. Small flowers do not demand much material, so even short lengths of yarn can sometimes become part of a useful project.
Choosing Yarn and Colors
Color is one of the easiest ways to personalize a crochet flower. You can keep the center and petals in one color for a clean monochromatic look, or change colors between rounds to make the petals stand out.
For a soft and classic appearance, try combinations such as cream with dusty pink, pale blue with white, or muted green with warm yellow. If you prefer something more energetic, combine several bright shades in the same flower collection.
Yarn fiber also influences the finished appearance. Cotton tends to create defined stitches and can be especially useful for decorative motifs. Acrylic yarn offers a wide range of colors and is often easy to work with. Softer fibers can produce a more relaxed flower with a gentle drape.
Understanding the Basic Flower Shape
Before beginning a crochet flower, it helps to understand how the shape is constructed. Most simple flower motifs begin with a small center. Stitches are then worked around that center to create loops or sections that become petals.
The number of petals depends on the stitch arrangement. Fewer, larger petals create a bold flower, while more compact petals can produce a fuller appearance. Increasing the number of stitches within each petal can also make the petals wider or more pronounced.
The key is to think of the flower as a series of repeated sections. Once you understand the relationship between the center and the petals, it becomes much easier to adapt a basic crochet flower pattern to different sizes and styles.
A Simple Crochet Flower Tutorial
The following method is intended as a beginner-friendly framework for creating a classic small flower. Stitch terminology can vary between patterns, so always check whether a pattern uses US or UK crochet terms before starting.
Step 1: Create the Center
Begin with a small adjustable ring or another suitable starting loop. The goal is to create a compact center that gives you enough space to work the first group of stitches.
Keep the center relatively snug, but avoid pulling the yarn so tightly that your hook cannot comfortably enter the stitches or spaces. A neat center helps establish the overall shape of the flower.
Step 2: Build the Petal Base
Work a series of stitches around the center to create the foundation for the petals. Depending on the style you want, these may be separated by small chain spaces. The spaces give the petals room to develop without overcrowding the center.
Try to keep the spacing consistent. If some sections are significantly tighter than others, the finished flower may appear uneven or twist unexpectedly.
Step 3: Form Each Petal
Work the selected stitches into each space or designated section to create a petal. The exact stitch combination can be adjusted according to the look you want. Shorter stitches tend to create flatter petals, while taller stitches can give the flower additional height and dimension.
Repeat the same sequence around the center. As each petal develops, gently arrange the stitches so they sit beside one another rather than bunching into one area.
Step 4: Finish the Flower
Once all petals are complete, secure the final stitch and leave a useful yarn tail for finishing. Use a yarn needle to weave the end through the back of the motif. If the flower will be attached to another item, you can reserve a longer tail and use it to sew the flower into place.
Take a moment to shape the petals with your fingers. Gentle arranging can make a noticeable difference, especially when the flower has been worked with a flexible yarn.
Expert Insight
If your petals look crowded, do not immediately assume you need a larger hook. Check the stitch count and spacing first. Uneven foundation spaces can change the shape of every petal that follows.
How to Make Crochet Flowers Look Neat
Small projects can sometimes reveal inconsistencies more clearly than large ones. Because a crochet flower has a compact shape, uneven tension or irregular stitch placement can quickly affect the symmetry.
One useful habit is to maintain a steady working tension throughout the motif. Avoid pulling every stitch extremely tight. At the same time, very loose stitches can make the petals floppy or difficult to arrange.
Another helpful technique is to pause after each petal. Instead of waiting until the entire flower is finished, gently check the shape as you work. This makes it easier to correct an uneven section while you still have access to it.
Blocking can also help certain yarn types. A light blocking process may encourage the petals to settle into a more consistent shape. Always consider the fiber and care instructions before applying heat or moisture.
Easy Ways to Customize Your Crochet Flower
Once you are comfortable with the basic structure, there are many ways to make the design your own. Crochet flower tutorials are especially enjoyable because small changes can produce completely different results.
Change the Number of Petals
Experiment with the number of spaces used for petals. A flower with fewer sections can look bold and graphic, while a flower with more sections may appear fuller and more delicate.
Create Different Sizes
Use finer yarn and a smaller hook for tiny flowers, or choose thicker yarn and a suitable larger hook for a larger motif. Remember that the final size depends on both the yarn and your personal tension.
Add a Decorative Center
A contrasting center can make a simple flower much more noticeable. Try a different yarn color, a small button, embroidered details, or another lightweight embellishment appropriate for the finished project.
Layer Multiple Flowers
For a dimensional effect, make two flowers in different sizes and layer the smaller one over the larger one. Secure the centers together and gently arrange the petals to create a fuller floral embellishment.
Creative Ways to Use Crochet Flowers
A finished crochet flower can be much more than a standalone motif. Because it is lightweight and easy to attach, it can become a decorative detail on countless handmade projects.
- Add a flower to a crochet hat or headband.
- Decorate a tote bag, pouch, or handmade purse.
- Use several flowers to embellish a blanket or cushion.
- Create a floral hair accessory.
- Attach flowers to gift wrapping for a reusable decorative touch.
- Use them as appliqués on garments and accessories.
- Arrange multiple motifs into a decorative wall or table display.
- Combine flowers with leaves and other crochet motifs for a larger composition.
When attaching a flower to another item, consider how the finished piece will be handled or washed. For frequently used accessories, secure the flower firmly through several points rather than relying on a single attachment point.
Common Crochet Flower Problems and Solutions
The Flower Is Curling Too Much
Some curling is normal in dimensional motifs, but excessive curling can indicate tight tension or a stitch arrangement that does not provide enough room for the petals. Try relaxing your tension or adjusting the spacing in the foundation.
The Petals Look Uneven
Check that each petal contains the same stitch sequence. Counting as you work can help prevent one petal from becoming larger or smaller than the others.
The Center Looks Too Loose
If the center has a noticeable opening, adjust the starting ring or tighten it carefully after the initial stitches are complete. A secure center generally gives the flower a cleaner appearance.
The Flower Looks Flat
If you want more dimension, experiment with taller stitches in the petals or add a second layer. The type of yarn also affects whether a flower looks crisp, soft, flat, or sculptural.
Why This Simple Project Is Great for Beginners
A small crochet flower gives beginners an opportunity to practice without the pressure of completing a large project. If you make a mistake, you only need to unravel a small amount of work. That makes experimentation much less intimidating.
- Practice working in rounds.
- Improve stitch consistency.
- Learn to recognize and correct uneven tension.
- Become more comfortable counting stitches.
- Experiment with color changes.
- Practice weaving in yarn ends neatly.
After making several flowers, you may notice that your hands naturally maintain a more consistent rhythm. You can then apply those skills to larger crochet projects such as blankets, bags, garments, and decorative motifs.
Tips for Making a Collection of Crochet Flowers
If you plan to make several flowers, consider choosing a small color palette before you begin. Repeating a few colors across different flower shapes can create a coordinated collection without making every piece identical.
It can also be useful to make flowers in several sizes. Combining tiny, medium, and larger motifs creates visual variety and gives you more options when decorating another crochet project.
Keep your finished flowers in a small container or craft organizer. Sorting them by color or size makes it easier to find the right motif when inspiration strikes.
Pro Tip: Make a few extra flowers whenever you are working with a favorite color combination. Having ready-made motifs on hand can turn a plain accessory into a personalized project in just a few minutes.
At a Glance
- Quick project with minimal yarn requirements.
- Easy to personalize with colors and sizes.
- Useful for accessories, décor, gifts, and crochet appliqué.
- Excellent practice for rounds, tension, counting, and finishing.
- Perfect for turning leftover yarn into something useful.
Conclusion: Keep Creating One Flower at a Time
A crochet flower tutorial may look simple, but this small project offers a surprising amount of creative freedom. You can change the colors, adjust the size, experiment with stitches, create layered petals, or combine several flowers into a completely new design.
For beginners, it is a practical way to build confidence with basic crochet techniques. For experienced crocheters, it is a relaxing project that can use leftover yarn and provide a quick decorative element for larger creations.
The next time you have a few minutes and some yarn nearby, try making a flower. Once you have one finished, make another in a different color or size. Before long, you can have a small collection ready to decorate bags, blankets, accessories, gifts, and anything else that could use a cheerful handmade detail.
Quick reminder: Crochet is all about experimentation. If your first flower is not perfectly symmetrical, keep practicing. Small adjustments to tension, stitch placement, and yarn choice can make a big difference as your skills grow.