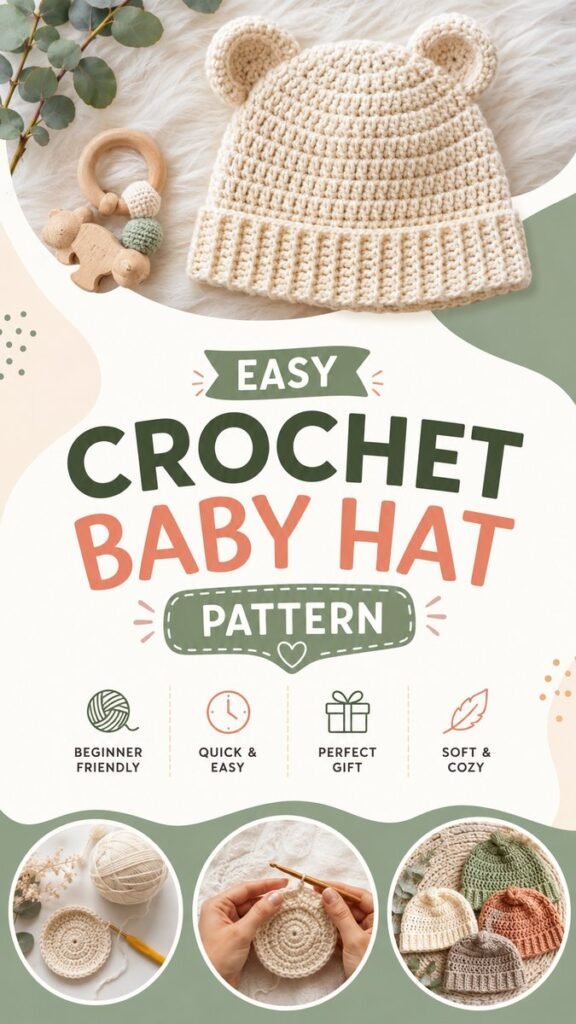
A handmade baby hat is one of those crochet projects that feels both practical and special. This easy crochet baby hat pattern combines a simple construction with a soft, textured look, making it a lovely project for beginners and an enjoyable quick make for experienced crocheters. The finished hat has a cozy folded brim and a classic rounded shape that can be customized with different yarn colors, sizes, and small decorative details.
Key Takeaways
- A crochet baby hat is a practical beginner-friendly project.
- Soft yarn and comfortable stitches are important for baby accessories.
- The simple shape makes it easy to personalize colors and finishing details.
- A folded brim adds warmth while giving the hat a polished appearance.
- Handmade baby hats make thoughtful gifts for showers, birthdays, and new arrivals.
Why Make an Easy Crochet Baby Hat?
Crochet baby hats are a wonderful way to practice basic crochet techniques while creating something useful. Unlike a large blanket or complicated garment, a small hat can usually be completed in a relatively short amount of time. That makes it especially appealing when you want a satisfying handmade project without committing to weeks of stitching.
The design shown here has a calm, neutral appearance with a chunky handmade texture. Its simple silhouette works beautifully in cream, beige, soft green, dusty pink, light blue, gray, or other gentle shades. A neutral color can create a timeless accessory, while brighter colors can make the same pattern feel playful and cheerful.
Important: When crocheting a baby hat, prioritize softness, comfortable construction, and an appropriate fit. A beautiful stitch pattern is only part of a successful baby accessory. The finished piece should feel gentle and comfortable against delicate skin.
Materials for a Crochet Baby Hat Pattern
You do not need a large collection of supplies to make a simple crochet baby hat. Keeping the materials straightforward is one reason this project works so well for beginners.
- Soft yarn: Choose a comfortable yarn suitable for baby garments and accessories.
- Crochet hook: Select a hook size that works with your yarn and creates a flexible fabric.
- Yarn needle: Useful for weaving in the ends neatly.
- Scissors: Keep a sharp pair nearby for clean yarn cuts.
- Measuring tape: Helpful for checking the finished circumference and overall length.
If you are making the hat as a gift, consider choosing yarn based on softness, washability, and everyday practicality. Babies can quickly turn clothing and accessories into messy projects, so easy-care materials can be particularly convenient for parents.
Understanding the Basic Hat Construction
A simple crochet baby hat can be thought of as two main sections: the crown and the body. The crown begins at the top and gradually increases until it reaches the desired width. Once the crown is large enough, the rounds continue with less or no increasing to create the sides of the hat.
The lower edge can then be finished with a ribbed or textured brim. In the pictured style, the substantial folded brim creates visual definition and gives the hat a cozy, structured finish.
Starting at the Crown
Many crochet hat patterns begin with a small center ring and work outward in rounds. The first few rounds establish the foundation of the crown. Increases are distributed around the circle so the fabric grows evenly rather than forming a narrow tube too early.
Keep your stitches consistent during these early rounds. If your tension changes significantly, the crown can become uneven or develop a noticeable ripple. Relaxed, even stitching usually produces a smoother shape.
Building the Sides
Once the crown reaches the necessary width, continue crocheting around to build the body. This is where the hat begins to take its recognizable shape. The fabric should sit comfortably without feeling excessively loose or tightly stretched.
Because crochet tension varies from person to person, measuring the project is more reliable than depending only on a row count. Try to think of the written pattern as a guide while using the actual fabric to confirm the fit.
Creating the Folded Brim
The brim is one of the most attractive details of this style. A deeper lower section creates a cozy appearance and gives the hat a finished, intentional look. Ribbed textures can also add stretch, which is useful for an accessory that needs to accommodate a range of head sizes.
Work the brim evenly around the lower edge and check its elasticity as you go. Avoid making it so tight that it loses the comfortable feel of the rest of the hat.
Expert Insight
For baby crochet projects, texture and tension work together. A slightly flexible fabric can make a simple hat much more comfortable than a stiff fabric created with overly tight stitches.
How to Get the Right Baby Hat Fit
Fit is one of the most important considerations when making a crochet baby hat. Babies grow quickly, and head sizes vary, so a useful approach is to measure whenever possible instead of relying entirely on age labels.
- Measure the head: If the hat is being made for a specific baby, take a comfortable measurement around the head.
- Consider stretch: Crochet fabric often has natural flexibility, especially when using textured or ribbed stitches.
- Check the crown: Make sure the crown covers the top of the head without creating excessive fabric.
- Check the length: The sides should provide comfortable coverage without falling too far over the face.
- Adjust your tension: If your fabric is much tighter or looser than expected, change the hook size or adjust your stitching tension.
Pro Tip: Make a small gauge sample before committing to the entire hat. Even a short swatch can reveal whether your stitches are producing the texture, flexibility, and overall density you want.
Choosing Colors for a Handmade Baby Hat
One of the easiest ways to personalize a crochet baby hat is with color. The soft cream shade of a classic neutral hat creates a timeless handmade look, but the same design can become completely different with another palette.
For a traditional nursery-inspired appearance, try ivory, oatmeal, taupe, sage, dusty blue, blush, or soft gray. If you want something more playful, combine two complementary shades or use a colorful variegated yarn.
You can also keep the entire hat one color and add a small contrasting detail around the brim. This creates visual interest without making the project complicated. Simple color choices are especially effective when the crochet texture itself is the main decorative feature.
Beginner Tips for Crocheting a Baby Hat
If this is one of your first crochet projects, focus on consistency rather than speed. The goal is to create an even fabric and understand how each round contributes to the shape.
- Count stitches regularly, especially during increase rounds.
- Use a stitch marker to identify the beginning of each round.
- Keep your yarn tension relaxed and consistent.
- Check the hat measurements as the project grows.
- Weave in yarn ends securely so the finished piece looks neat.
- Take breaks if your hands become tired, particularly when working with thicker yarn.
It is also helpful to practice the main stitch on a small swatch before starting the hat. This gives you an opportunity to become comfortable with your hook and yarn while making it easier to spot tension problems early.
Simple Ways to Customize the Pattern
A basic crochet baby hat pattern can become the foundation for many different designs. Once you understand the basic construction, small changes can create a completely new finished look.
Try Different Brim Styles
A folded brim creates a cozy winter-inspired appearance, while a shorter ribbed edge can produce a lighter everyday hat. Experimenting with the depth and texture of the brim is an easy way to personalize the finished piece.
Experiment With Texture
Changing the stitch pattern can dramatically alter the look of a hat. Smooth stitches create a clean appearance, while textured stitches add dimension and emphasize the handmade character of the project.
Add a Playful Detail
A small pom-pom, simple crocheted flower, contrasting stripe, or animal-inspired feature can turn a basic hat into a playful accessory. Keep embellishments securely attached and consider the intended age and use of the finished piece when deciding whether to add them.
Why Crochet Baby Hats Make Great Gifts
Handmade baby hats are appealing gifts because they combine practicality with a personal touch. A small project can be made in a favorite color, coordinated with nursery colors, or matched to another handmade accessory.
They are also useful projects for building a handmade gift collection. Once you become comfortable with one simple crochet baby hat pattern, you can repeat the design in several colors and adjust the sizing for different stages of early childhood.
For a baby shower gift, consider pairing the hat with another handmade item such as a small blanket or coordinating accessory. Keeping the color palette consistent can make the collection look thoughtfully planned without requiring an elaborate design.
Caring for a Handmade Crochet Baby Hat
Care instructions depend on the yarn used, so always follow the recommendations provided with your chosen material. Gentle handling can help preserve the shape and texture of the crochet fabric.
When storing a handmade hat, keep it clean and completely dry before putting it away. Avoid crushing it beneath heavy items, especially if the hat has a textured brim or decorative details that you want to maintain.
A little attention to care can help a handmade crochet baby hat remain soft, attractive, and ready for repeated use.
At a Glance
- Choose a soft, comfortable yarn.
- Measure for a better fit.
- Keep your tension even throughout the rounds.
- Use the brim and color to personalize the design.
- Finish neatly and follow the yarn care instructions.
Conclusion
An easy crochet baby hat pattern is a rewarding project that combines simplicity, comfort, and handmade charm. The classic rounded shape and cozy folded brim provide a versatile foundation that can be adapted for different colors, textures, and sizes. Whether you are learning crochet for the first time or looking for a quick handmade gift, a baby hat offers plenty of opportunities to practice your skills while creating something genuinely useful.
Start with a soft yarn, work at a comfortable tension, and check the fit as you go. Once you have mastered the basic construction, experiment with colors, stitch textures, and simple finishing details to make each hat your own. Keep this idea nearby whenever you need an approachable crochet project that is small, practical, and full of handmade personality.