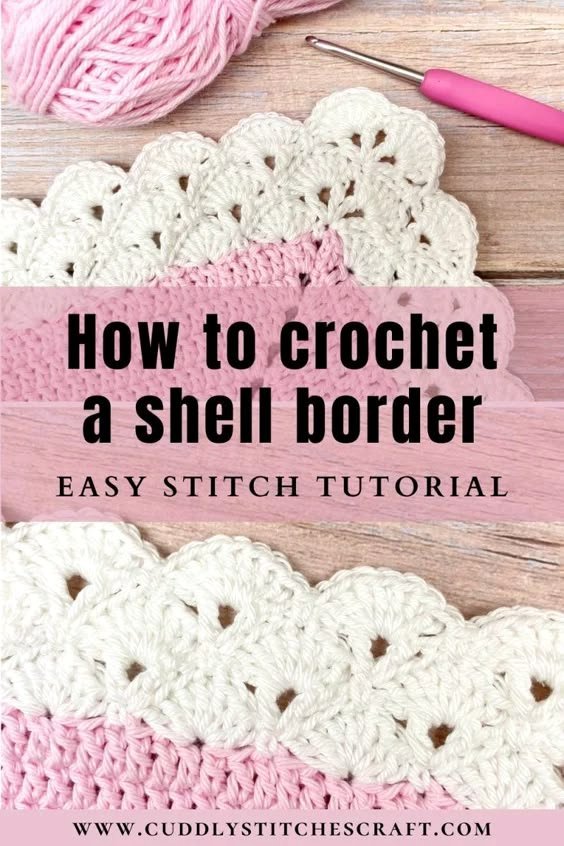
Adding a beautiful crochet baby blanket edging is one of the simplest ways to turn a handmade blanket into a polished, thoughtful keepsake. A carefully chosen border can frame the blanket, highlight its texture, soften the overall look, and give the finished project that special handmade touch. Whether you prefer a delicate scalloped edge, a classic single crochet border, a textured stitch, or a decorative floral-inspired finish, the right edging can make a familiar blanket design feel completely new.
Key Takeaways
- A crochet edging gives a baby blanket a neat, finished appearance.
- Simple borders are excellent for beginners and work with many blanket patterns.
- Scallops, shells, picots, and textured stitches can create a more decorative finish.
- Choosing a suitable yarn weight helps the border blend naturally with the blanket.
- Consistent tension is important for keeping the blanket edge smooth and flat.
- A thoughtful border can make a handmade baby blanket feel extra special and gift-ready.
Why Crochet Baby Blanket Edging Makes a Difference
The edge of a crochet blanket is more than a finishing detail. It creates a visual frame around the entire project and can influence how the colors, stitches, and overall texture are perceived. Even a very simple blanket can look more complete once it has a carefully worked border.
For baby blankets, edging can be especially charming because small decorative details naturally complement soft colors and cozy textures. A narrow border keeps the design understated, while a wider decorative edging can become the main feature of the finished piece.
Important: The best baby blanket edging is not necessarily the most complicated one. A simple border with even stitches, balanced corners, and consistent tension can look more professional than an elaborate design that overwhelms the blanket.
Another advantage of adding an edging is that it gives you an opportunity to bring the entire project together. A border can repeat one of the blanket’s existing colors, introduce a subtle contrast, or create a soft neutral frame around a colorful center.
Choosing the Right Crochet Border
There are countless crochet border ideas available, but not every style will suit every blanket. Start by considering the blanket’s stitch pattern, yarn weight, color palette, and intended look. A heavily textured blanket may benefit from a clean, understated edge, while a simple blanket can provide the perfect canvas for a decorative border.
Simple Single Crochet Edging
A single crochet border is one of the easiest options for beginners. It creates a clean outline around the blanket without competing with the main design. Several rounds can also be worked if you want a slightly wider frame.
This type of edging is particularly useful when the blanket already contains an interesting stitch pattern. Instead of adding another focal point, the border quietly finishes the edges and gives the whole project a tidy appearance.
Scalloped Crochet Edging
Scalloped borders add a soft decorative effect that works beautifully with baby blankets. The repeating curved shapes create movement around the edge while maintaining a gentle appearance.
Scallops can be made narrow and subtle or larger and more noticeable. They are especially attractive when worked in a contrasting color, although a matching shade creates a more seamless finish.
Shell Stitch Borders
Shell stitches are another popular choice for decorative crochet edging. Their rounded shape gives a blanket a classic handmade appearance, and they can be adapted to create anything from a delicate trim to a more dramatic border.
If your blanket is relatively simple, a shell border can add visual interest without requiring you to redesign the main portion of the project.
Picot and Textured Edges
For a smaller decorative detail, consider a picot-style finish or another textured stitch. These borders can add tiny points, loops, or raised details along the outside edge.
They work particularly well when you want the edging to remain delicate. A small textured trim can provide just enough contrast to make the blanket feel finished without making the border look heavy.
How to Match the Edging to Your Blanket
One of the easiest ways to choose a border is to look at the existing design and identify its strongest visual feature. If the blanket has bold stripes, a simple solid-color border may provide balance. If the blanket is made in one color, a decorative edging can introduce texture and personality.
Color is another important consideration. You can use the same yarn color for a subtle monochromatic finish or select a coordinating shade for gentle contrast. For a more playful baby blanket, several colors can be combined in the border, provided they complement the main design.
It is also helpful to consider scale. A tiny baby blanket can become visually crowded if the border is extremely wide. A narrow or medium-width edging will often provide enough definition while keeping the blanket soft and practical.
Expert Insight
Think of the border as a frame. If the blanket already has plenty of texture or color, let the edging provide balance. If the blanket is visually simple, the border can become the decorative feature.
Getting the Blanket Ready for Edging
Before beginning the border, inspect the outside edge of the blanket carefully. A neat foundation makes the edging much easier to work and helps prevent uneven corners or unwanted rippling.
If the blanket edge is uneven because of the stitch pattern, you may need to distribute stitches thoughtfully rather than trying to force the same number of stitches into every section. The goal is to create an edge that lies flat and supports the decorative border.
Blocking can also be helpful, depending on the yarn and blanket construction. Gentle blocking may improve the shape and make the edges easier to work. Always consider the fiber and care instructions before applying heat or moisture.
Check Your Tension
Consistent tension is one of the most important factors when creating crochet edging. If your stitches are too tight, the blanket may begin to curl. If they are too loose, the border can look wavy or oversized.
Work slowly around the first round and check the blanket frequently. If the edge starts pulling inward or creating waves, adjust the stitch spacing before continuing.
Pay Attention to the Corners
Corners deserve extra attention because they determine how the border turns from one side to the next. A corner that is too tight can pull the blanket inward, while too many stitches can cause the corner to flare.
Depending on the stitch pattern, you may need additional stitches in each corner to maintain a smooth shape. Once you find a corner arrangement that works, repeat it consistently around the blanket.
Step-by-Step Crochet Baby Blanket Edging Process
Creating a border does not have to be complicated. A thoughtful process can help you achieve a clean and consistent result, even if you are relatively new to crochet.
- Inspect the blanket. Look around all four sides and identify uneven areas, corners, and places where stitches may need to be distributed.
- Choose your yarn. Select a yarn that works naturally with the blanket’s existing weight and texture.
- Pick the border style. Decide whether you want a simple, decorative, textured, or multicolor edging.
- Attach the yarn carefully. Begin in a suitable corner or edge location according to your chosen pattern.
- Work the foundation round. Keep your tension consistent and make sure the border remains flat.
- Shape the corners. Add the appropriate number of stitches so the blanket turns smoothly.
- Add decorative rounds. Once the foundation is stable, continue with scallops, shells, picots, or another chosen design.
- Finish neatly. Secure the yarn and weave in the ends carefully so the completed blanket looks polished.
Pro Tip: After completing each round, lay the blanket flat and look at the border from several angles. Catching a tight corner or uneven section early is much easier than correcting it after several additional rounds.
Best Yarn and Color Ideas for Baby Blanket Borders
For a cohesive result, the edging yarn should generally have a similar weight and feel to the yarn used throughout the blanket. A dramatically different thickness can make the border look disconnected or cause the blanket to lose its balanced shape.
Soft, gentle colors are a natural choice for baby blankets, but there is no need to limit yourself to traditional pastel shades. Cream, ivory, soft gray, muted green, warm beige, dusty pink, pale blue, and other understated tones can create a timeless appearance.
If you want the edging to stand out, choose a coordinating contrast rather than a completely unrelated color. For example, a neutral blanket can be framed with a slightly deeper shade from the same color family.
A multicolor border can also be effective when the blanket already contains several colors. Repeating existing shades around the edge helps create a unified appearance instead of making the border feel like a separate element.
Common Crochet Edging Mistakes to Avoid
Even a simple border can become frustrating if the edge does not behave as expected. Fortunately, most problems can be prevented with a few simple checks.
- Too many stitches: Excess stitches can make the border ripple.
- Too few stitches: A tight stitch count can cause the edge to pull or curl.
- Uneven tension: Changes in tension can make one side look different from another.
- Ignoring corners: Corners need enough room to turn smoothly.
- Using unsuitable yarn: A significantly different yarn weight may affect the blanket’s shape.
- Choosing an overly elaborate border: A busy edging can compete with an already detailed blanket.
The best approach is to pause regularly and inspect your work. Crochet borders are repetitive, which makes it easy to continue working without noticing a small problem. A quick check every few inches can save considerable time later.
Ideas for Personalizing a Handmade Baby Blanket
A crochet edging provides plenty of opportunities for personalization. You can keep the border understated for a classic nursery accessory or make it more decorative for a memorable handmade gift.
Consider repeating a stitch from the center of the blanket in the edging. This creates a subtle connection between the main design and the finished border. Another option is to introduce a small contrasting color that appears only around the outside edge.
For a more traditional appearance, layered borders can be used. Start with a simple foundation round, add a second textured round, and finish with a small decorative trim. Keeping each layer relatively narrow helps the final result remain balanced.
You can also experiment with alternating colors from round to round. This is particularly effective on striped or multicolor blankets and can make the edging feel like a natural extension of the main design.
Making Your Crochet Edging Look Professional
Professional-looking crochet is often less about complicated techniques and more about consistency. Even stitch tension, clean corners, careful color changes, and neatly woven ends can make a significant difference.
Take your time with the first round. This foundation determines how the rest of the border will sit. If necessary, undo a small section and adjust the stitch distribution rather than accepting an edge that does not lie flat.
When joining rounds, aim for a neat and consistent finish. The joining method should complement the stitch pattern rather than creating an obvious bump or gap. Once the final round is complete, weave in all loose ends securely and gently shape the blanket.
Most importantly, remember that handmade work does not need to look machine-perfect. Small variations can add character. The goal is a finished blanket that feels intentional, comfortable, and beautifully made.
At a Glance
- Choose an edging that complements the blanket rather than competing with it.
- Keep yarn weight and texture compatible with the main blanket.
- Watch tension carefully to prevent curling or rippling.
- Give extra attention to corners for a smooth finished shape.
- Use color thoughtfully to create either a seamless or contrasting border.
Final Thoughts on Crochet Baby Blanket Edging
A beautiful crochet baby blanket edging can transform the final appearance of a handmade project without requiring a complicated redesign. Whether you choose a simple single crochet frame, a soft scalloped trim, a classic shell border, or a delicate textured finish, the edging gives the blanket a sense of completion.
The key is to match the border to the blanket’s existing style while paying close attention to tension, corners, color, and stitch distribution. A thoughtful border should enhance the blanket, preserve its shape, and add a charming handmade detail that feels natural.
Most of all, enjoy the finishing process. The border is where the individual pieces of a crochet project come together, and it is often the detail that makes a handmade baby blanket feel truly special. Save your favorite crochet baby blanket edging ideas, experiment with different stitches, and let the final trim become your signature touch.