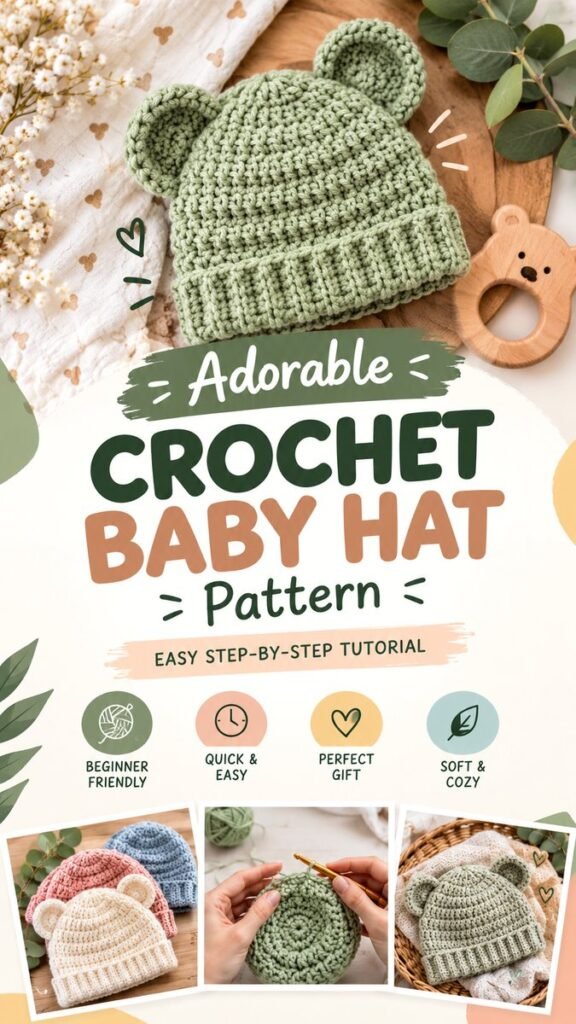
There is something especially satisfying about making a tiny handmade hat for a baby. A crochet baby hat can be a quick project, a thoughtful handmade gift, and a great way to practice simple crochet techniques at the same time. This easy crochet baby hat free pattern is designed around the idea of keeping things comfortable, practical, and beginner-friendly while still creating a sweet finished piece.
The featured style has a soft, rounded shape, a cozy folded brim, and a simple textured crochet finish. The neutral and pastel color options shown in the design make the hat easy to personalize, whether you are preparing a newborn gift, building a handmade baby wardrobe, or simply looking for your next relaxing crochet project.
Key Takeaways
- A simple crochet baby hat is an approachable project for beginners.
- A folded brim gives the hat a cozy, finished appearance.
- Soft yarn and gentle colors work beautifully for baby accessories.
- The basic design can be adapted with colors, embellishments, or cute ear details.
- Handmade baby hats make practical gifts for showers, birthdays, and newborn celebrations.
Why Crochet a Baby Hat?
Baby hats are one of those crochet projects that feel rewarding from the very first few rounds. They are small enough to finish without committing to a large blanket or complicated garment, yet they give you plenty of opportunities to practice stitch consistency, shaping, counting, and finishing.
An easy crochet baby hat is also wonderfully versatile. You can make a classic neutral version in cream or beige, choose soft sage green for a modern natural look, or experiment with gentle pink, blue, yellow, or lavender. Making several hats in coordinating colors is a lovely way to create a handmade collection.
The biggest advantage of a beginner-friendly hat pattern is that you can focus on creating an even, comfortable fabric rather than worrying about complicated construction. Once you understand the basic shape, the project becomes much easier to customize.
A Small Project With Plenty of Possibilities
Because a baby hat uses a relatively small amount of yarn compared with many other crochet projects, it can also be a useful stash-busting idea. Small leftover skeins in suitable colors can become adorable accessories instead of sitting unused in your craft basket.
The simple silhouette shown here is particularly useful because it can serve as a starting point for many variations. Keep it plain for a timeless look, add stripes for visual interest, or change the texture to create a completely different personality.
Materials for an Easy Crochet Baby Hat
You do not need an extensive collection of supplies to begin. A basic crochet setup is enough for this type of project.
- Soft baby-friendly yarn: Choose a comfortable yarn with a pleasant texture and appropriate care instructions.
- Suitable crochet hook: Select a hook that works well with your yarn and produces a flexible fabric.
- Yarn needle: Useful for weaving in the ends neatly.
- Scissors: Keep a small sharp pair nearby for clean finishing.
- Measuring tape: Helpful when checking the finished size and fit.
- Optional stitch marker: Especially useful when working in continuous rounds.
Choosing the Right Yarn
For baby accessories, softness is an important consideration. Look for yarn that feels comfortable against delicate skin and is easy to wash according to the care requirements of the intended recipient. A smooth yarn also makes stitches easier to see, which is particularly helpful when you are learning.
Neutral shades such as cream and oatmeal create the cozy handmade appearance seen in the inspiration, while sage, dusty pink, pale blue, and other muted colors can give the same design a modern feel.
A Simple Color Strategy
If you are unsure which color to choose, start with one main shade rather than combining several colors. A single soft color allows the stitch texture and shape of the hat to remain the focus. Once you feel comfortable with the basic construction, you can introduce contrasting stripes or a different-colored brim.
Understanding the Basic Crochet Baby Hat Shape
At first glance, a crochet hat can look more complicated than it really is. The overall construction is based on a few simple ideas. You begin at the top, build outward as the crown grows, continue until the hat reaches the desired depth, and finish with a brim that creates a snug and polished edge.
The circular crown is what gives the hat its rounded form. Increasing too quickly can create a flatter shape, while increasing too slowly can make the crown appear more pointed. The goal is a gradual expansion that allows the fabric to curve naturally.
Expert Insight
For a polished baby hat, pay attention to tension as much as stitch count. Consistent tension helps the fabric remain flexible and keeps the crown and sides from becoming uneven. If your stitches become noticeably tighter as you crochet, pause, relax your hands, and check the shape before continuing.
How to Approach the Pattern Step by Step
Even when following a beginner crochet pattern, it helps to understand what each stage is accomplishing. Thinking about the construction makes it easier to recognize where you are in the project and troubleshoot small mistakes.
- Create the starting center. Begin with the foundation required for a circular crochet crown.
- Build the crown. Work the early rounds while adding increases to gradually expand the circle.
- Establish the sides. Once the crown reaches the desired width, continue working around without unnecessary increases.
- Check the depth. Measure the hat as you go rather than waiting until the final round.
- Add the brim. Finish with a comfortable band that gives the hat structure and a neat appearance.
- Finish carefully. Secure the yarn and weave in the ends so the inside remains tidy.
Keep Your Tension Consistent
Beginners often discover that their first few rounds are tighter than the later ones. This is completely normal while learning. Try to hold the hook and yarn comfortably instead of gripping them too firmly. Your stitches should move naturally along the hook without requiring force.
If the fabric feels stiff, your tension may be too tight. If it looks unusually loose or the hat loses its shape, your tension may be too relaxed. Small adjustments can make a noticeable difference in the final result.
Measure as You Go
One of the most useful habits when crocheting baby clothing is checking measurements throughout the project. Babies grow quickly, and even small differences in yarn weight, hook size, and tension can affect the finished dimensions.
Instead of relying only on the number of rounds, compare the developing hat with the intended measurements for the size you are making. This approach is much more flexible and helps you catch sizing issues early.
Creating a Cozy Folded Brim
The folded brim is one of the most visually appealing details in this style of crochet baby hat. It adds a little extra structure around the lower edge and creates the cozy, finished look associated with classic handmade winter accessories.
A ribbed-looking brim can also provide visual contrast against the main body of the hat. Even when the rest of the project uses simple stitches, the change in texture makes the finished accessory look more thoughtfully designed.
When working on the brim, prioritize flexibility. A baby hat should feel comfortable rather than rigid, so avoid pulling every stitch extremely tight just to create a more defined ribbed effect.
Cute Ways to Customize Your Baby Hat
Once you are comfortable with the basic pattern, there are many ways to make each hat feel unique without changing the entire construction.
- Try different colors: Make a soft cream hat for a timeless look or use sage, blush, blue, or another muted shade.
- Add stripes: Alternate two coordinating colors for a playful design.
- Experiment with texture: A subtle stitch variation can give the body a different appearance.
- Create playful ears: Rounded bear-style ears can turn a simple hat into an especially cute accessory.
- Change the brim: A contrasting brim can make the finished hat look completely different.
- Make a matching set: Coordinate the hat with a handmade blanket, booties, or another baby accessory.
Keep Embellishments Simple
Simple designs often work best for baby accessories. If you add decorative elements, make sure they are securely attached and appropriate for the intended use. A clean crochet texture can be beautiful on its own, so there is no need to overload a small hat with extra details.
Why This Pattern Works for Beginners
An easy crochet baby hat is an excellent learning project because it introduces several fundamental skills without requiring a large amount of yarn or time. You can practice working in rounds, increasing evenly, maintaining tension, checking measurements, and finishing a project neatly.
The small size also makes experimentation less intimidating. If your first attempt is not perfect, you have not spent weeks working on it. You can adjust your tension, change the hook, try another yarn, and make a second version with what you learned.
Quick Note
- Do not worry if your first crown is not perfectly smooth.
- Check your tension regularly instead of trying to correct everything at the end.
- Keep a written note of your hook, yarn, and adjustments so your next hat is easier to reproduce.
Tips for Making a Better Crochet Baby Hat
Choose Comfort Over Appearance
A beautifully textured stitch is wonderful, but comfort should remain the priority for baby accessories. Select a yarn that feels pleasant and create a fabric with enough flexibility for easy wear.
Check the Hat Frequently
Try not to wait until the last round to evaluate the size. Pause periodically to inspect the width and depth. This simple habit can save you from having to unravel a large section later.
Keep the Finished Piece Neat
Take time to weave in yarn ends securely and trim excess yarn cleanly. A tidy finish can make a handmade project look significantly more polished, especially when the design itself is intentionally simple.
A Sweet Handmade Baby Shower Gift
Few handmade gifts feel as personal as something created specifically for a new baby. A crochet baby hat is small, useful, and easy to pair with other thoughtful items. You can make one in a neutral color for a surprise gift or coordinate the shade with a nursery theme if you already know the family’s preferences.
For an extra special presentation, fold the hat neatly and place it alongside a handmade blanket, soft baby accessory, or simple gift card. Making several hats in different colors can also create a charming little gift set.
The beauty of handmade gifts is not perfection. Small variations in stitches are part of what makes a handmade item feel personal. A thoughtfully made crochet hat can become a keepsake that reminds someone of a special moment long after the project is finished.
Easy Crochet Baby Hat Ideas for Every Season
The basic concept can be adapted depending on the season and yarn you choose. A lighter yarn and breathable stitch pattern can work well for milder weather, while a warmer yarn and cozy texture can create a more winter-ready accessory.
For autumn and winter projects, earthy shades such as cream, oatmeal, sage, rust, and muted brown create a warm handmade aesthetic. For spring and summer, softer pastels can give the same shape a lighter appearance.
You can also create a collection of hats that changes with the baby’s wardrobe. Keeping the basic construction consistent makes it easy to experiment with color without having to learn an entirely new pattern each time.
Troubleshooting Common Beginner Problems
The Crown Looks Wavy
If the crown develops noticeable waves, you may have added more increases than the fabric needs. Check your stitch count and review the instructions for the current round. A slight adjustment in the next round may help restore the shape.
The Hat Looks Too Flat
A crown that remains very flat may need a different increase balance or more gradual shaping. Compare the developing shape with the intended design and check whether your tension is unusually loose.
The Fabric Feels Too Stiff
Very tight tension can create a firm fabric that does not drape comfortably. Try relaxing your grip or experimenting with a slightly different hook size while keeping the yarn requirements in mind.
Make This Crochet Baby Hat Your Own
The best part of a simple crochet pattern is the freedom it gives you. Once you understand the basic construction, you can focus on the details that make your project feel personal. Change the color, adjust the brim, experiment with texture, or create a tiny collection of coordinating hats.
For beginners, this project is also a reminder that crochet does not have to be complicated to be beautiful. A clean shape, soft yarn, consistent stitches, and a carefully finished edge can create an accessory that looks polished while remaining approachable to make.
At a Glance
- Beginner-friendly crochet project
- Soft, cozy baby accessory
- Easy to customize with colors and textures
- Great idea for handmade baby gifts
- A practical project for building crochet confidence
Conclusion
An easy crochet baby hat is a wonderful project when you want something useful, adorable, and manageable. The rounded shape, cozy brim, and soft handmade texture create a timeless accessory that can be adapted in countless ways. Whether you are a beginner learning the basics or an experienced crocheter looking for a quick handmade gift, this style gives you plenty of room to be creative.
Start with a comfortable yarn, work patiently, keep your tension consistent, and check the size as you go. Then have fun choosing colors and small design details that make the finished hat special. With a simple approach and a little practice, you can create a collection of sweet crochet baby hats that are perfect for gifting, seasonal outfits, or adding a handmade touch to everyday baby essentials.