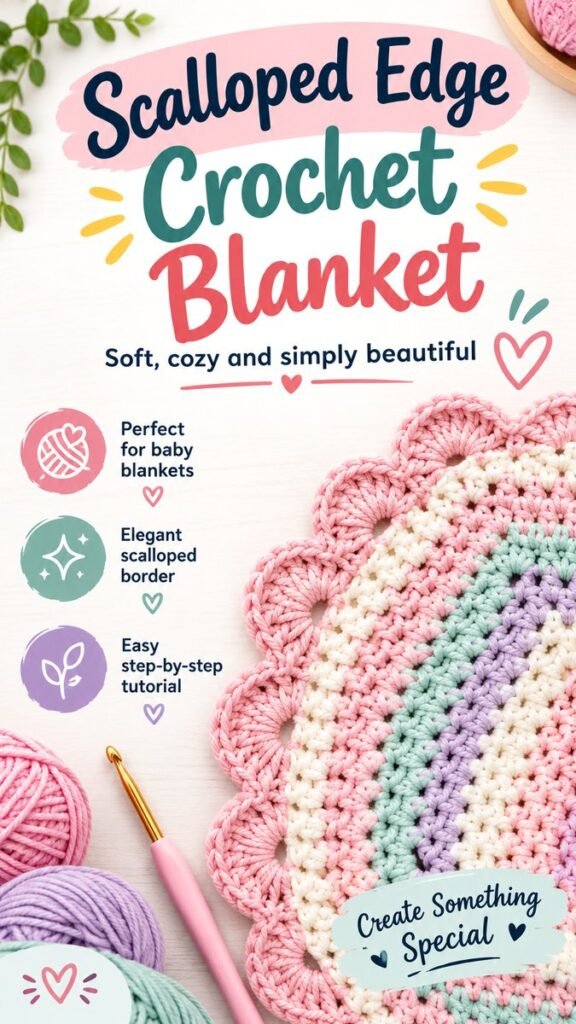
Adding a beautiful border can completely transform a handmade baby blanket, turning a simple crochet project into a polished keepsake. A soft scalloped edge is especially charming because the rounded shells create a gentle decorative finish without overwhelming the blanket itself. Whether you are making a cozy baby afghan, a nursery throw, or a thoughtful handmade gift, crochet baby blanket borders can add personality, texture, and a professional-looking finish.
Key Takeaways
- Scalloped borders create a soft, rounded finish for baby blankets.
- Pastel shades work beautifully with gentle nursery-inspired designs.
- A border can help frame the blanket and give the edges a finished appearance.
- Simple shell-style edging is suitable for many crochet blanket designs.
- Color coordination can make the border look intentional and polished.
Why Crochet Baby Blanket Borders Make a Difference
A blanket may already have a lovely stitch pattern, but the outer edge is often what gives the entire project its final character. A thoughtfully chosen crochet border can visually frame the blanket, soften straight edges, and introduce an attractive repeating detail.
For baby blankets, rounded edging is particularly appealing. Scallops and shell shapes naturally create a sweet, cozy look that pairs well with soft yarn colors. The result feels decorative without needing complicated embellishments.
Important: When choosing a border for a baby blanket, aim for an edge that complements the main fabric rather than competing with it. A simple repeating shell pattern can provide plenty of visual interest while keeping the overall design calm and balanced.
Scalloped Edge Crochet Ideas for Baby Blankets
The scalloped edge shown in this style of crochet design uses rounded sections to create a soft wave around the blanket. Instead of leaving the outer edge straight, the repeated curves give the piece a decorative silhouette.
This type of border works particularly well with blankets featuring stripes or bands of color. The edging can repeat one of the existing shades, introduce a contrasting color, or use a neutral yarn to tie several colors together.
Soft Shell Borders
Shell-inspired edging is one of the most recognizable choices for a decorative crochet blanket border. Groups of stitches are arranged to create rounded sections that resemble small shells. The repeated shape produces a consistent pattern while adding texture along the outside of the blanket.
A shell border can be especially attractive when worked in a slightly contrasting shade. For example, a pastel blanket can be finished with a soft pink edge, while a more colorful afghan may look better with cream or another understated neutral.
Rounded Baby Blanket Edges
Rounded edges bring a gentle visual quality to handmade baby blankets. They can make a geometric or striped interior feel softer and more playful. This makes them a natural choice for nursery blankets, stroller blankets, and handmade gifts.
When planning a rounded border, pay attention to how the corners transition into the scallops. A neat corner treatment helps the repeating pattern flow naturally instead of appearing crowded or uneven.
Choosing Colors for a Crochet Blanket Border
Color is one of the easiest ways to change the personality of a crochet border. The pastel blanket look works beautifully with combinations of pink, cream, mint, lavender, and other gentle shades. These colors create a light and cheerful appearance that suits many baby-themed projects.
There are several approaches you can take when selecting your border color:
- Match the blanket: Use a color already present in the blanket for a coordinated finish.
- Choose a neutral: Cream, white, or another soft neutral can frame colorful rows without adding visual competition.
- Create contrast: Select a complementary shade when you want the scalloped edge to stand out.
- Repeat a favorite accent: If one color appears only in a small portion of the blanket, using it for the border can make the design feel more cohesive.
Pro Tip: Before crocheting the entire border, place small amounts of your possible yarn colors next to the blanket. Seeing the shades together in natural light can make it much easier to decide whether you want a subtle frame or a more noticeable decorative edge.
How to Plan a Scalloped Crochet Border
A little preparation can make a decorative blanket border much easier to manage. The first step is to examine the existing edge. If the blanket has a straight, even foundation, you may be able to work directly into the edge. If the edge is uneven, an initial preparation round can help establish a consistent base for the scallops.
Step 1: Check the Blanket Edge
Look around all four sides and identify areas where the stitch spacing changes. Corners deserve particular attention because the border needs enough room to turn without bunching.
Step 2: Decide on the Border Color
Consider whether you want the border to blend into the blanket or become a feature of its own. A matching shade produces a seamless appearance, while contrast can make the scallops more prominent.
Step 3: Establish an Even Base
If needed, crochet a simple foundation round around the blanket before adding the decorative edging. This can help create a more predictable surface for the repeating border pattern.
Step 4: Build the Repeating Scallops
The decorative section is created by repeating groups of stitches at regular intervals. The exact stitch combination can vary depending on the look you want and the crochet pattern you are following. The important visual goal is consistency from one shell to the next.
Step 5: Finish and Inspect the Corners
Once the border is complete, gently lay the blanket flat and inspect the corners and sides. Look for areas that pull inward, ripple, or appear too loose. A quick visual check can help you spot irregularities before blocking or finishing the project.
Why This Matters
- Even spacing helps scallops maintain their rounded shape.
- A balanced corner prevents the border from looking crowded.
- Consistent tension creates a cleaner, more professional finish.
Making Your Baby Blanket Border Look Neat
Even a simple border can look impressive when the tension and spacing are consistent. Try to maintain the same crochet tension throughout the edging. If your stitches become tighter or looser as you work, the scallops may vary in size.
It is also helpful to pause occasionally and spread the blanket out on a flat surface. This gives you a chance to see how the border is developing rather than discovering an uneven section after several rounds.
Do not be afraid to gently undo a small section if something does not look right. Correcting a few stitches early is usually easier than trying to disguise a noticeably uneven border later.
Crochet Border Ideas for Different Blanket Styles
A scalloped edge is versatile enough to complement many blanket designs. The key is to consider the scale, colors, and texture of the main fabric.
Striped Baby Blankets
Striped blankets already have strong horizontal movement, so a rounded border can provide a softer visual frame. Try using one of the stripe colors around the outside for a coordinated look.
Pastel Crochet Afghans
Pastel blankets are a natural match for delicate shell borders. Soft pink, lavender, mint, cream, and similar shades can be combined for a cheerful handmade aesthetic.
Neutral Baby Blankets
For a neutral blanket, the border can introduce the main decorative color. A gentle accent shade around the edge can give an otherwise simple blanket a distinctive handmade character.
Gift Blankets
A decorative border can make a handmade blanket feel especially thoughtful when it is being prepared as a gift. Choose a color combination that reflects the overall style of the blanket and keep the edging comfortable, soft, and practical.
Common Crochet Border Mistakes to Avoid
One of the most common problems with blanket borders is adding too many stitches around the edge. When there is excess fabric, the border can begin to ripple. On the other hand, too few stitches can cause the blanket edge to pull inward.
Another issue is inconsistent tension. Even if the stitch count is correct, significant changes in tension can affect the appearance of the scallops. Work at a comfortable pace and try to keep your hands relaxed.
- Avoid overcrowding the corners.
- Keep stitch tension as consistent as possible.
- Check the border regularly instead of waiting until the end.
- Choose a yarn weight that works naturally with the blanket.
- Test your edging idea on a small sample when you are unsure.
Important: A beautiful border does not have to be complicated. The strongest designs often rely on a simple repeating shape, thoughtful color selection, and even stitch tension. Focus on those three details before adding extra decoration.
Simple Ways to Personalize a Scalloped Edge
Once you understand the basic idea behind a scalloped border, you can personalize the finished look in many ways. Experiment with the number of stitches used in each shell, the spacing between shells, or the color of individual rounds. Always test modifications on a small sample first so you can see how the finished shape behaves.
You can also make the border more understated by choosing a color close to the main blanket shade. For a stronger statement, select a contrasting pastel or neutral. A narrow border followed by a scalloped finishing round can create a layered effect without making the blanket feel overly busy.
Texture is another option. Combining a relatively simple blanket body with a more dimensional edging can create a pleasing contrast. This is particularly useful when the main blanket uses a straightforward stitch pattern and needs a small decorative feature to complete the design.
Caring for a Handmade Crochet Baby Blanket
After putting time into a handmade blanket, proper care is important. Always check the yarn manufacturer’s care recommendations before washing the finished piece. Different fibers can respond differently to water, heat, agitation, and drying methods.
When the blanket is washed, handle the scalloped border gently. Decorative edges can benefit from being laid flat into their intended shape while drying, particularly if the project has been washed and the stitches need a little help returning to an even arrangement.
Keeping the finished blanket folded neatly when it is not in use can also help preserve its shape. Avoid placing unnecessary weight on delicate decorative edges for long periods.
At a Glance
- Scalloped edging adds a soft decorative frame.
- Pastel colors create a gentle baby blanket aesthetic.
- Consistent spacing keeps shell shapes looking balanced.
- Matching or contrasting yarn can completely change the final look.
- A simple border can make a handmade blanket feel polished and complete.
Conclusion
Choosing the right crochet baby blanket border is a simple way to give a handmade project a memorable finishing touch. A scalloped edge brings soft curves, gentle texture, and a charming decorative frame to the blanket while allowing the main stitch pattern and colors to remain the focus.
Whether you prefer delicate pastel shades, a clean neutral finish, or a more noticeable contrast, the right border can make your crochet blanket feel complete. Pay attention to stitch spacing, corner placement, yarn compatibility, and consistent tension, and even a straightforward edging can create a beautiful result.
For your next baby afghan, consider experimenting with rounded shell shapes and coordinated colors. Save these baby blanket border crochet ideas as inspiration and return to them whenever a new blanket needs that final handmade detail.