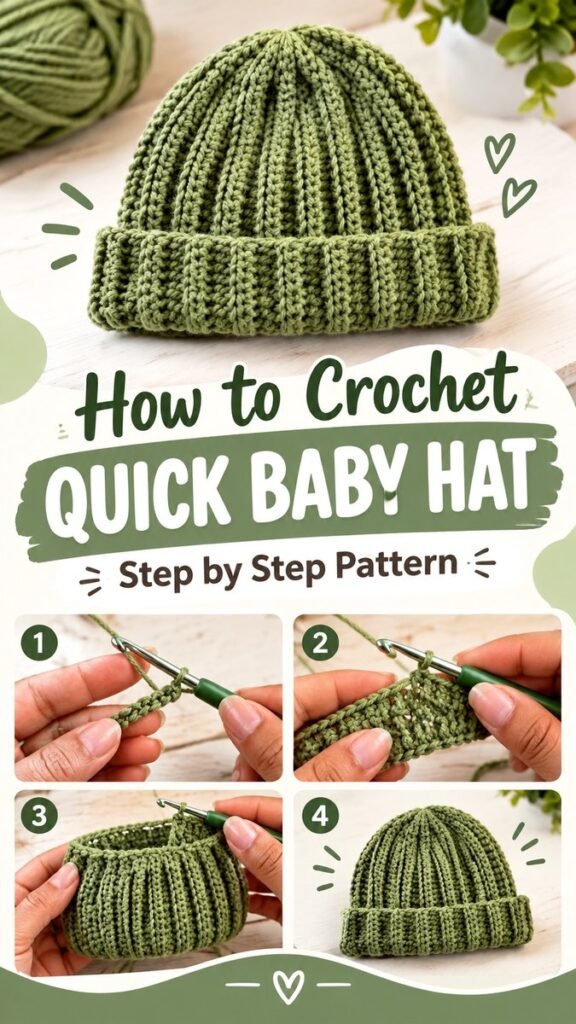
There is something especially satisfying about making a tiny handmade accessory for a baby, and a crochet baby hat is one of the sweetest projects to try. This cozy ribbed design combines a simple shape with textured crochet stitches, creating a warm, stretchy-looking hat that is practical and adorable. Whether you are searching for a baby hat crochet pattern free to make as a thoughtful gift or simply want an easy crochet project for your next crafting session, this style offers plenty of inspiration.
Key Takeaways
- A ribbed crochet baby hat creates a cozy, textured finish.
- The basic hat shape is approachable for crocheters who enjoy simple projects.
- Sage green yarn gives the finished piece a soft, timeless appearance.
- A folded brim adds structure while creating a comfortable-looking fit.
- This type of project can be adapted with different yarn colors and finishing details.
- The finished hat makes a charming handmade baby gift.
Why Crochet a Baby Hat?
Baby hats are small enough to feel manageable, yet they provide an excellent opportunity to practice crochet techniques and stitch consistency. A hat like this can be completed as a focused weekend project, making it appealing when you want something useful without committing to a large blanket or complicated garment.
The ribbed texture shown in this design is particularly attractive because it gives the hat a dimensional appearance. Instead of a completely flat fabric, the vertical ridges create visual movement from the crown down to the folded brim. The result looks handmade, cozy, and polished.
Important: When crocheting a baby hat, comfort should always be considered alongside appearance. Choose soft, baby-appropriate yarn and avoid rough textures, loose embellishments, or decorative elements that could become uncomfortable or unsafe.
The Appeal of a Ribbed Texture
Ribbing is a popular choice for crochet hats because it adds stretch and creates a classic knitted-inspired appearance. In the pictured design, the vertical ridges run from the top of the hat toward the brim, giving the finished piece a neat and structured look.
Texture also helps a simple silhouette feel more interesting. You do not need elaborate color changes or complicated decorative motifs when the stitch pattern itself provides enough visual detail.
Choosing Yarn for a Crochet Baby Hat
Yarn selection can make a significant difference in how a finished baby hat feels and looks. Since the project is designed for a baby, softness is an important consideration. Look for yarn that feels comfortable against the skin and is suitable for the intended use.
The sage green color in this design creates a calm, natural appearance. It is easy to imagine the same pattern in cream, beige, dusty pink, soft blue, warm brown, or another gentle shade. Neutral colors can make the hat especially versatile, while brighter shades can give the project a playful personality.
What to Look For
- A soft texture suitable for baby clothing and accessories.
- Consistent yarn thickness for an even stitch pattern.
- A color that complements the simple ribbed design.
- Care instructions that work well for the recipient’s needs.
It is also helpful to make a small swatch before beginning the full hat. Even when following a familiar crochet technique, different yarns and hooks can produce noticeably different fabric densities.
Basic Supplies for the Project
A crochet baby hat does not require a large collection of materials. Keeping the supply list simple is one reason small crochet accessories are such enjoyable projects for beginners.
- Soft yarn appropriate for a baby accessory
- A crochet hook that suits the selected yarn
- Scissors
- A yarn needle for finishing
- A measuring tape
- Optional stitch markers
The exact yarn amount and hook size will depend on the desired size, yarn weight, crochet technique, and individual tension. Rather than relying only on a visual example, use measurements and a gauge swatch when making the hat for a particular baby.
Understanding the Construction
The design shown in the image has a straightforward hat silhouette. The main body forms a rounded crown, while the lower portion becomes a substantial folded brim. The pronounced vertical texture makes the construction easy to appreciate visually.
Many crochet hats can be thought of as three main areas: the crown, the body, and the brim. The crown gradually creates the rounded top. The body establishes the overall height. The brim provides a finished lower edge and can add extra stretch and structure.
Starting the Project
Begin by checking the desired finished measurements and preparing your yarn and hook. A foundation chain or starting section is then worked according to the chosen pattern method. Keep your tension consistent from the first stitches onward, because uneven tension can affect the final size and shape.
For a ribbed appearance, the stitch technique is typically arranged so that raised and recessed sections create vertical lines. Pay attention to where the hook is inserted on each row or round. Small changes in stitch placement can significantly alter the texture.
Building the Ribbed Body
Once the foundation is established, continue working the textured rows or rounds while checking the width and height periodically. The goal is to create a fabric that has enough flexibility to sit comfortably without becoming excessively loose.
The close-up process images associated with this style of project highlight how the hook works through the crocheted fabric to build each textured section. This is a useful reminder that neat stitch placement is more important than rushing through the rows.
Expert Insight
The most attractive ribbing usually comes from consistent tension rather than working as quickly as possible. If your stitches begin looking noticeably tighter or looser, pause and reset your hand position before continuing.
Creating the Crown
The crown is what transforms a flat or tubular section of crochet into a rounded hat. Depending on the construction method, shaping may involve decreases or a gradual reduction in the number of stitches. The important goal is to create a smooth transition toward the top without producing large gaps.
As you approach the crown, regularly check how the fabric is gathering. A neat crown should close naturally and maintain the overall rounded shape. If the top looks uneven, review the previous rows before moving forward rather than trying to correct the problem only at the very end.
Finishing the Top
Once the crown reaches the appropriate size, finish it securely and weave in the yarn ends carefully. A clean finish helps the hat maintain its shape and gives the handmade piece a more polished appearance.
Take a moment to inspect the inside as well as the outside. For a baby accessory, you want the interior to be comfortable and free from unnecessarily bulky ends or decorative pieces.
Adding the Folded Brim
One of the most recognizable features of this crochet baby hat is the wide folded brim. It gives the lower edge a cozy, substantial appearance while visually balancing the textured crown.
The brim can also be an opportunity to emphasize the ribbed stitch pattern. When the vertical texture continues through this section, the transition between the main body and brim looks cohesive.
Before finalizing the brim, compare its width with the rest of the hat. A brim that is too narrow may disappear visually, while one that is excessively wide can dominate the small silhouette. The pictured design uses a prominent folded section that complements the rounded crown.
Tips for a Neater Crochet Finish
Small handmade projects can sometimes reveal inconsistencies more clearly than larger pieces. Because a baby hat is compact, keeping your stitches even throughout the project can make a noticeable difference.
- Check your tension regularly. Avoid changing your grip or pulling the yarn dramatically tighter as you work.
- Count stitches when needed. Consistent stitch counts help preserve the intended shape.
- Watch the edges. Pay close attention when turning or joining rows and rounds.
- Measure as you go. A measuring tape can help you catch sizing issues early.
- Finish yarn ends securely. Take time to weave them into the fabric neatly.
- Inspect the finished hat. Look for loose loops, uneven sections, or uncomfortable areas before use.
Pro Tip: If your ribbing looks less defined than the example, do not immediately change the pattern. First check your stitch placement and tension. Texture often becomes much clearer when the same motion is repeated consistently from row to row.
Making the Pattern Your Own
Once you are comfortable with the basic construction, there are many simple ways to personalize a crochet baby hat. Color is the easiest place to start. The same textured design can look completely different when made in a soft neutral, pastel shade, earthy tone, or cheerful bright color.
You can also experiment with the proportions of the brim, the amount of slouch in the crown, or the overall height. Keep any modifications gradual and compare the measurements with your intended size as you work.
Simple Color Ideas
- Sage green: calm, natural, and similar to the inspiration shown here.
- Cream: soft and timeless for a minimalist handmade look.
- Dusty pink: gentle and playful.
- Muted blue: classic and versatile.
- Warm beige: neutral and easy to coordinate with baby outfits.
Why This Matters
A simple crochet pattern becomes much more versatile when you understand its construction. Once you recognize the crown, body, texture, and brim as separate elements, you can make thoughtful adjustments without losing the character of the original design.
- Use color changes to create a different mood.
- Adjust proportions carefully to suit the intended fit.
- Keep the stitch texture as the main decorative feature.
A Thoughtful Handmade Baby Gift
A crochet baby hat can be a lovely handmade gift because it combines usefulness with the personal touch of something made by hand. The compact size also makes it convenient to package alongside other small baby essentials.
For gifting, consider making the hat in a versatile color and presenting it neatly folded. A simple handmade card can add a personal touch without taking attention away from the crochet work.
If you are building a collection of handmade baby accessories, this style can also serve as a foundation for coordinating projects. Matching colors across hats, blankets, booties, or other simple crochet pieces can create a thoughtful handmade set.
Common Crochet Baby Hat Mistakes to Avoid
Even an easy crochet baby hat can become frustrating if the basic measurements are overlooked. One common issue is working with tension that changes throughout the project. This can cause the finished fabric to become wider or narrower than expected.
Another issue is failing to check the hat’s proportions as you go. It is much easier to adjust a project during construction than after all the finishing work has been completed.
It is also worth remembering that handmade baby accessories should prioritize comfort and practical construction. Avoid unnecessary loose embellishments and make sure every finishing end is secured properly.
A Better Way to Troubleshoot
If something looks wrong, stop and identify the exact point where the appearance changed. Compare several rows rather than focusing on only one stitch. This can help you determine whether the problem comes from stitch placement, tension, counting, or shaping.
Taking a short break can also help. Fresh eyes often make it easier to spot an uneven section that was difficult to notice while concentrating on each individual stitch.
How to Care for a Handmade Crochet Baby Hat
Care should always follow the instructions for the specific yarn used. Different fibers can respond differently to washing, drying, heat, and stretching. If the yarn label provides care instructions, use those recommendations as your primary guide.
After washing, reshape the hat gently rather than pulling aggressively on the ribbed sections. Allowing the fabric to retain its natural shape can help preserve the texture and overall appearance.
When storing the finished hat, keep it clean and dry. Folding it gently is generally preferable to compressing it under heavy items.
At a Glance
- Choose a soft yarn suitable for a baby accessory.
- Keep stitch tension consistent for defined ribbing.
- Check measurements during construction.
- Finish and secure yarn ends carefully.
- Personalize the look with soft, coordinated colors.
Final Thoughts
A baby hat crochet pattern free project is a wonderful way to enjoy a small, practical crochet make while creating something special by hand. The ribbed design shown here proves that a simple silhouette can still have plenty of character when texture, proportions, and color work together.
Start with a comfortable yarn, pay attention to your stitch placement, and check the size as you progress. Once the basic construction becomes familiar, you can experiment with colors and proportions to create your own version of this cozy baby accessory.
Whether you are learning crochet, preparing a handmade gift, or simply looking for an approachable project to add to your crafting list, a textured crochet baby hat is a rewarding choice. Keep the design simple, focus on neat workmanship, and enjoy watching a small ball of yarn turn into a useful handmade piece.
Ready for Your Next Crochet Project?
Save this idea for your crochet inspiration collection and come back when you are ready to make a cozy little hat. A simple textured pattern can be the perfect starting point for a thoughtful handmade gift.
Tags
Baby Hat Crochet Free Crochet Pattern Crochet Baby Hat Easy Crochet Crochet for Beginners Baby Crochet Patterns Handmade Baby Gifts span style=”display:inline-block;background:#eef3e8;color:#3f5d36;border-radius:20px;padding:7px 13px;margin:4px;font-size:14px;”>Crochet Tutorial