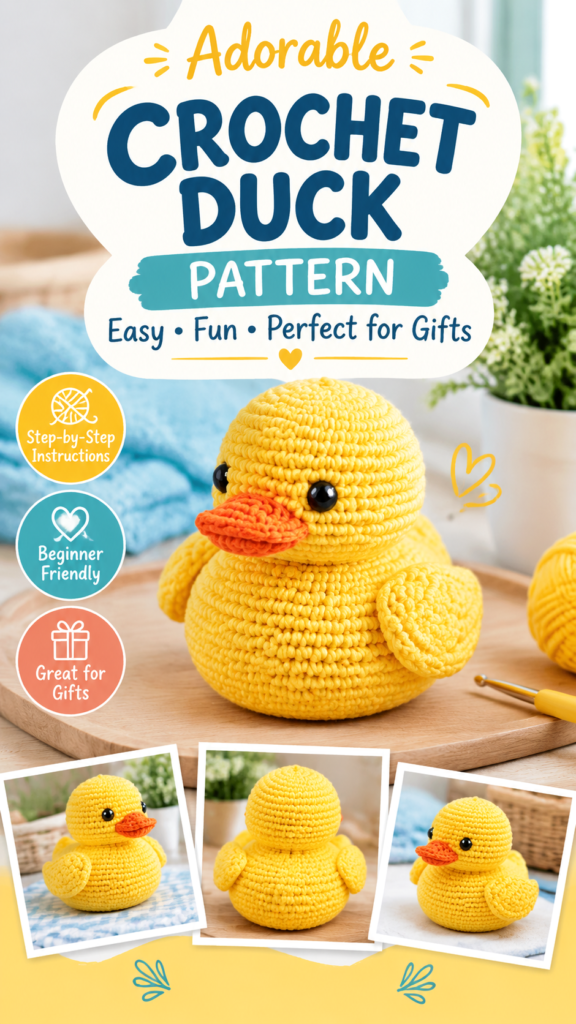
The baby duck crochet pattern is a sweet amigurumi project designed to bring handmade charm to nurseries, baby gift baskets, and cozy handmade collections. This cheerful little duck features a rounded body, soft wings, a bright orange beak, and a simple embroidered face that gives it a lovable expression. The design uses basic crochet stitches worked in continuous rounds, making it an enjoyable project for confident beginners who want to explore amigurumi techniques.
This original interpretation uses suggested materials and construction methods to create a similar style of plush crochet duck. The exact details of any photographed item cannot be determined, but the pattern below provides a complete, workable design using beginner-friendly shaping, neat color changes, and simple assembly techniques.
Key Takeaways
- Project type: Soft amigurumi baby duck toy with separate wings and beak.
- Skill level: Beginner-friendly with basic shaping techniques.
- Main techniques: Continuous rounds, single crochet, increases, decreases, and embroidery.
- Recommended yarn: Soft worsted weight cotton or acrylic yarn for a plush finish.
- Finished size: Approximately 5 inches (12.7 cm) tall.
- Customization options include different colors, facial expressions, and decorative details.
Description of the Crochet Baby Duck Project
This crochet baby duck pattern creates a small stuffed amigurumi duck with a rounded silhouette and a soft handmade appearance. The project category is plush crochet toys, and the finished duck works beautifully as a nursery decoration, baby shower gift idea, or keepsake for a child’s room.
The duck is designed with a bright yellow body, a rounded head that blends into the body shape, small oval wings, and an orange beak. The visible texture is similar to traditional amigurumi fabric created with tightly worked single crochet stitches. A compact stitch structure helps the stuffing stay inside while creating a smooth, even surface.
The recommended yarn is a soft medium-weight yarn such as category 4 worsted weight cotton blend or acrylic yarn. Cotton provides crisp stitches and easy shaping, while acrylic creates a softer plush feel. A smaller crochet hook than normally used for the yarn helps create a firm fabric suitable for stuffed toys.
This project is best suited for crocheters who understand basic stitches but want to practice shaping. The most important skills include working in continuous rounds, placing increases evenly, using invisible decreases, and attaching small pieces securely.
Crochet Construction and Stitch Analysis
The baby duck is constructed using separate crocheted components that are assembled after stuffing. The head and body are worked as one continuous rounded piece to create a seamless plush shape. The wings, beak, and optional feet are made separately and sewn onto the body.
The primary stitch used throughout the project is the single crochet stitch. Single crochet creates a dense fabric that works well for amigurumi because it reduces gaps between stitches. The shaping comes from evenly spaced increases that widen the form and decreases that create the curved top and tapered sections.
Pro Tip: For a professional amigurumi finish, keep your tension firm and use an invisible decrease whenever possible. This creates smoother curves and prevents noticeable bumps in the stuffed shape.
Free Crochet Pattern: Sunny Baby Duck Amigurumi
Project Description: This original baby duck crochet pattern creates a small plush duck with a rounded yellow body, orange beak, soft wings, and embroidered facial details. It is designed as a decorative handmade item or gift keepsake.
| Skill Level | Easy to Intermediate Beginner |
| Finished Size | Approximately 5 inches (12.7 cm) tall |
| Yarn | Category 4 worsted weight cotton or acrylic yarn, approximately 100 yards (91 meters) yellow, 15 yards (14 meters) orange, small amount black or dark brown |
| Hook | 2.75 mm crochet hook (US size C-2) |
| Gauge | Approximate gauge: 20 single crochet stitches x 22 rounds in 4 inches (10 cm) |
| Terminology | US crochet terminology |
Materials and Notions
- Yellow worsted weight yarn
- Orange worsted weight yarn
- Black embroidery thread or yarn
- Polyester fiberfill stuffing
- Stitch marker
- Yarn needle
- Scissors
Crochet Terminology and Abbreviations
- ch: chain
- sc: single crochet
- inc: increase, work 2 sc in one stitch
- dec: decrease, crochet two stitches together
- sl st: slip stitch
- st: stitch
- MR: magic ring
- FO: fasten off
UK equivalent note: sc is called double crochet (dc) in UK terminology. This pattern uses US terminology throughout.
Construction Notes
The head and body are crocheted in continuous rounds. Do not join rounds unless instructed. Place a stitch marker in the first stitch of each round and move it upward as you work.
Body and Head
- Round 1: With yellow yarn, make a MR. Work 6 sc into the ring. (6)
- Round 2: Inc in each stitch around. (12)
- Round 3: (Sc in next stitch, inc) repeat 6 times. (18)
- Round 4: (Sc in next 2 stitches, inc) repeat 6 times. (24)
- Round 5: (Sc in next 3 stitches, inc) repeat 6 times. (30)
- Rounds 6-11: Sc in each stitch around. (30)
- Round 12: (Sc in next 3 stitches, dec) repeat 6 times. (24)
- Round 13: Sc in each stitch around. (24)
- Round 14: (Sc in next 2 stitches, dec) repeat 6 times. (18)
- Begin stuffing firmly. Add more stuffing as the opening becomes smaller.
- Round 15: (Sc in next stitch, dec) repeat 6 times. (12)
- Round 16: Dec around. (6)
- FO and close the opening with a yarn needle.
Wings (Make 2)
- Round 1: With yellow yarn, make a MR and work 6 sc into the ring. (6)
- Round 2: Inc around. (12)
- Round 3: Sc around. (12)
- Round 4: (Sc in next stitch, dec) repeat 4 times. (8)
- Round 5: Sc around. (8)
- Flatten the wing slightly and leave a long tail for sewing.
Beak
- Round 1: With orange yarn, make a MR and work 6 sc into the ring. (6)
- Round 2: (Sc in next stitch, inc) repeat 3 times. (9)
- Round 3: Sc around. (9)
- Flatten the piece and FO, leaving a sewing tail.
Assembly Instructions
- Sew the beak centered on the front of the head area.
- Attach the wings on both sides of the body approximately halfway down from the head.
- Embroider two small oval eyes using black embroidery thread. Place them evenly on each side of the beak.
- Secure all yarn ends inside the duck body.
Important: If making this duck as a baby gift, avoid plastic safety eyes, buttons, beads, or other detachable parts. Embroidered facial features are the safer choice for babies and children under three.
Finishing
Lightly shape the duck with your hands after stuffing. No blocking is usually required for amigurumi, but gently adjusting the curves can help create an even silhouette. If needed, smooth the stitches by lightly steaming nearby areas without pressing directly onto the stuffed toy.
Customization and Size Adjustment Guidance
The baby duck crochet pattern can easily be personalized with different yarn colors, facial expressions, and accessories. Soft pastel shades can create a nursery-style look, while bright colors create a playful toy appearance.
- For a larger duck, use a larger hook and thicker yarn while keeping the same stitch sequence.
- For a smaller duck, use lightweight yarn and a smaller crochet hook.
- Add embroidered eyelashes, tiny blush details, or a small crocheted bow for decoration.
- Create a family of ducks by changing the yarn colors for different personalities.
Common Mistakes and Troubleshooting
- Loose stuffing showing: Use a smaller hook or tighten your tension to create a denser fabric.
- Uneven shape: Check that increases and decreases are placed correctly and count stitches after each round.
- Wobbly facial placement: Pin pieces in place before sewing to check symmetry.
- Lumpy stuffing: Add small amounts of fiberfill gradually instead of one large piece.
Care, Finishing, and Handmade Toy Maintenance
For long-lasting results, choose washable yarn and follow the care instructions recommended for the fiber. Handmade amigurumi pieces should be gently cleaned with mild soap and air dried flat.
Store the duck away from excessive moisture and avoid placing heavy objects on top of it. Regularly check stitched features if the item is used around young children.
At a Glance
- Best yarn choice: Soft worsted weight cotton or acrylic yarn.
- Skill level: Beginner-friendly amigurumi.
- Key technique: Continuous-round single crochet shaping.
- Size adjustment: Change yarn weight and hook size for different dimensions.
- Finishing method: Secure stuffing, neat sewing, and embroidered details.
Create Your Own Handmade Crochet Baby Duck
This baby duck crochet pattern is a charming way to practice amigurumi skills while creating a thoughtful handmade gift. With simple stitches, rounded shaping, and endless customization options, this crochet project is perfect for adding a handmade touch to nursery decor or gift baskets.
Choose your yarn carefully, check your tension when needed, and read through the complete pattern before starting. Personalize your duck with your favorite colors and enjoy the process of creating a soft crochet companion made with care.
Tags
Baby Duck Crochet Pattern
Amigurumi Duck
Free Crochet Pattern
Beginner Crochet Project
Handmade Crochet Gift
Nursery Decor Crochet